Remix 入门实战
导读
谢谢你阅读这本 《Remix 入门实战》小书。我在完成了 EpubKit 的初步开发后,内心一直有冲动想写了本关于 Remix 的小书。我 Google 了一下国内关于 Remix 这个框架的资料发现少之又少,偶尔有几篇,但也已经是几年前了。
几年前我也尝试过 Remix, 但当时 Remix 还处于非常早期的阶段,引不起我的兴趣。在做 EpubKit 时,因为无法忍受 Next.js App Router 的一些奇怪行为,以及部署到非 Vercel 平台的奇怪错误,我决定再次尝试 Remix. 没想到整个过程非常愉悦,所以我想是时候让更多人知道这个美妙的框架了。
之所以称之为美妙,是因为我在使用 Remix 写 Web app 时,我发现我再也不需要自己管理很多的 state, 不需要再用 react-hooks-form 来管理我的表单值。不需要用 react-query 来做 API 请求。在 Remix 中,都是 Web 标准的表单提交,它给我一种感觉:我在用最经典古老的 Web 技术,但在这个基础上加了一些现代前端页面必要的东西,而这些东西是不需要自己过多去手动处理的。
在我用 Remix 重写 EpubKit 时,有一个最让我印象深刻的点,是在 EpubKit 里有一个拖拽列表,原本我需要手动地监听这个组件的 onChange 事件,然后 setState 重新保存这个数组的顺序。但使用 Remix 时,因为不存在手动的 API 请求(基本都是 Form 表单提交),所以我发现我根本不需要管理这个状态,我只需要在被拖拽的组件里加一个 <input>, 那么在提交表单的时候,自然就按照顺序提交到我的服务端了。
最后在完成迁移后,EpubKit 只用了两个 useEffect, 一个 useState.
我无意引起框架好坏的争论,这没有意义。但我认为应该让更多人体验到 Remix 的开发乐趣,所以有了这一本小书。
这本书确实很小,我用一个博客系统涵盖了 Remix 最常用的 API. 这不是一本完全从入门到精通的读物,我认为精通是靠读文档和实践而成的,不是靠一本书得到的。在这本小书,读者可以一窥 Remix 的开发体验,也可以动手跟着书的节奏一起写代码。
这本书的内容还会涉及数据库的读写,但即使有读者对数据库不是很在行(我也不在行),只要能理解关系型数据库的概念,我想应该就足够读懂了。
在写这本小书时,我越发感觉文字很难给读者传达完整的技术思想,如果本书有传达不清楚的地方,烦请在 Twitter 上 @randyloop 或发送邮件到 [email protected]
万一这本书给了你启发,也希望可以不吝在社交网站告诉我。
你也可以购买本书 PDF 版本
Randy Lu (https://lutaonan.com) 完成于 2024.2.1
博客系统实战
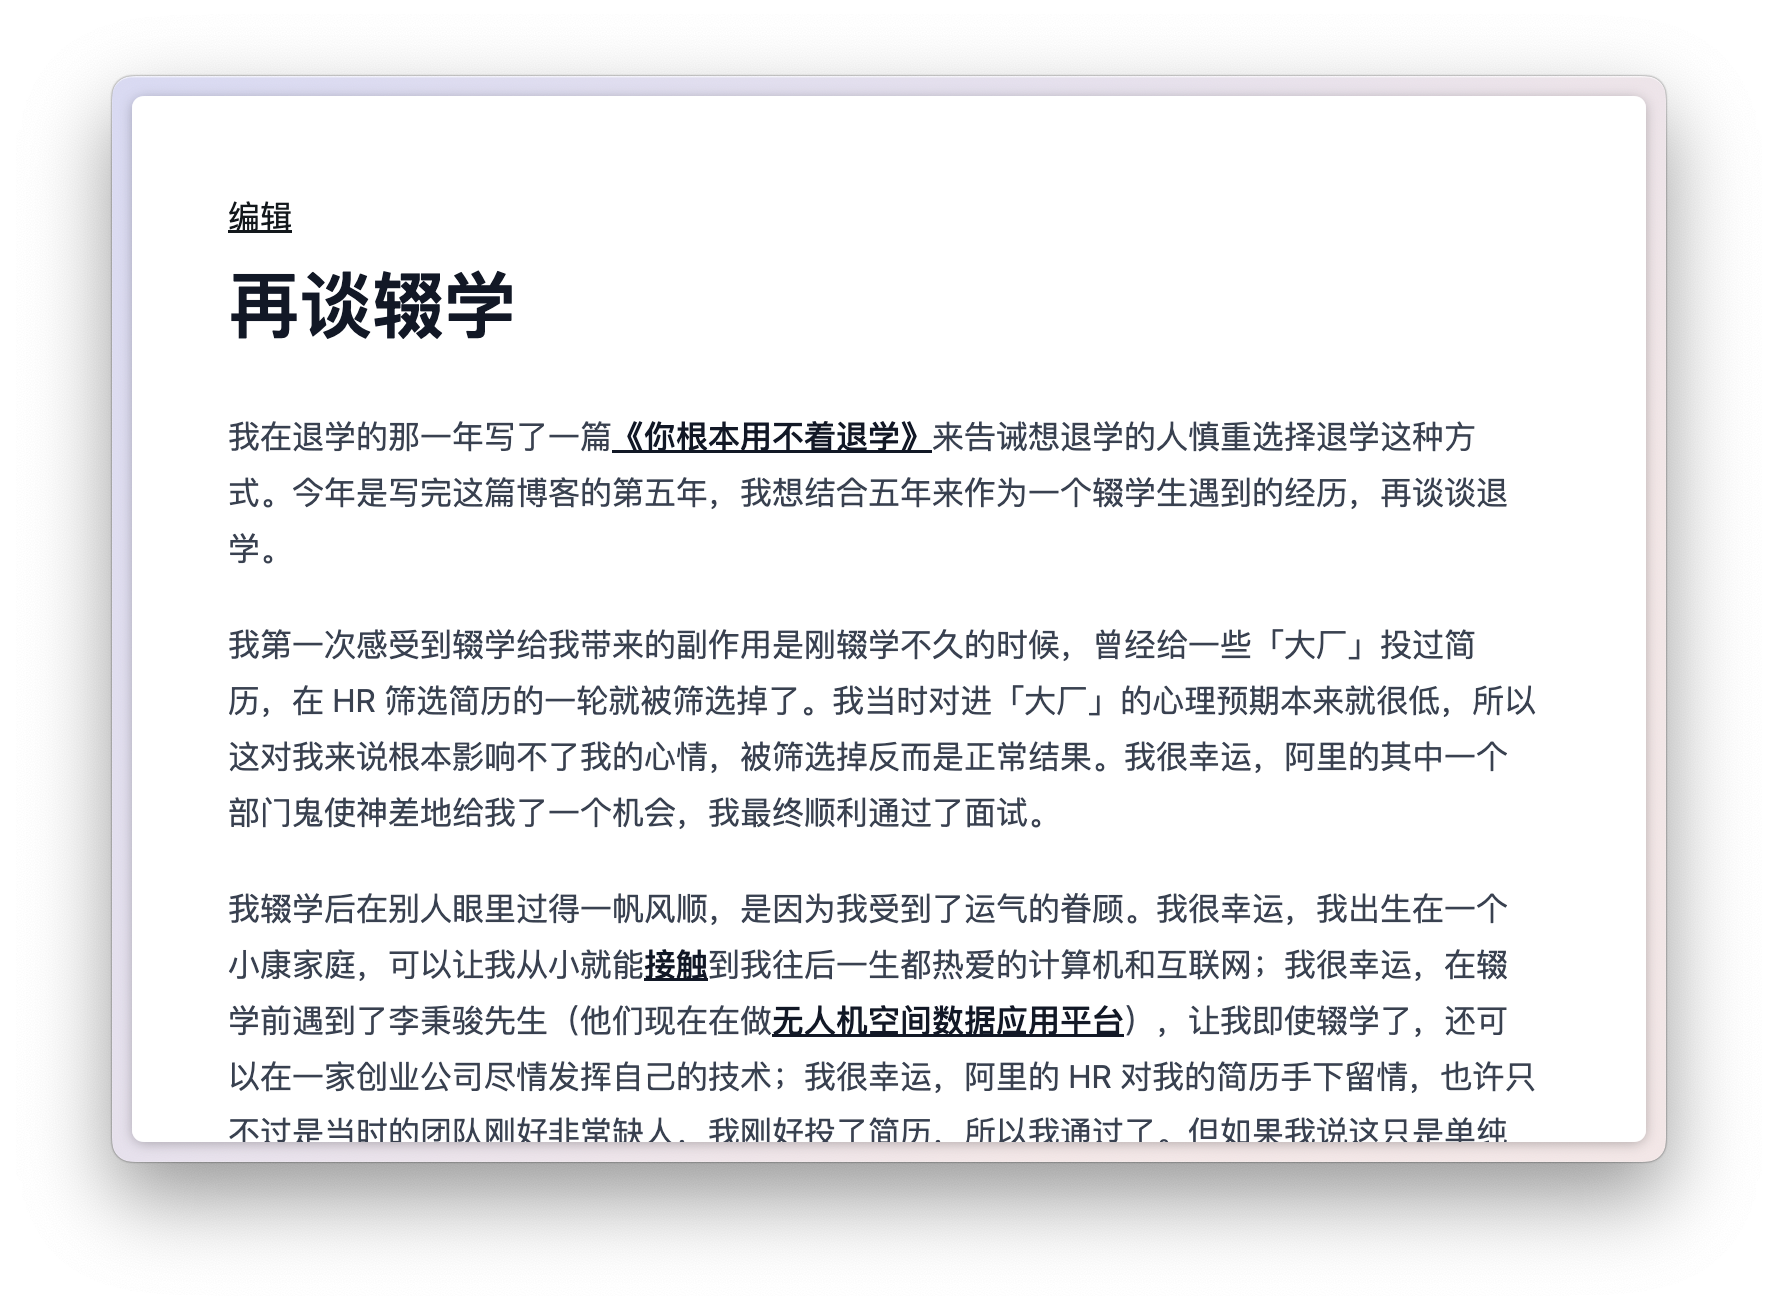
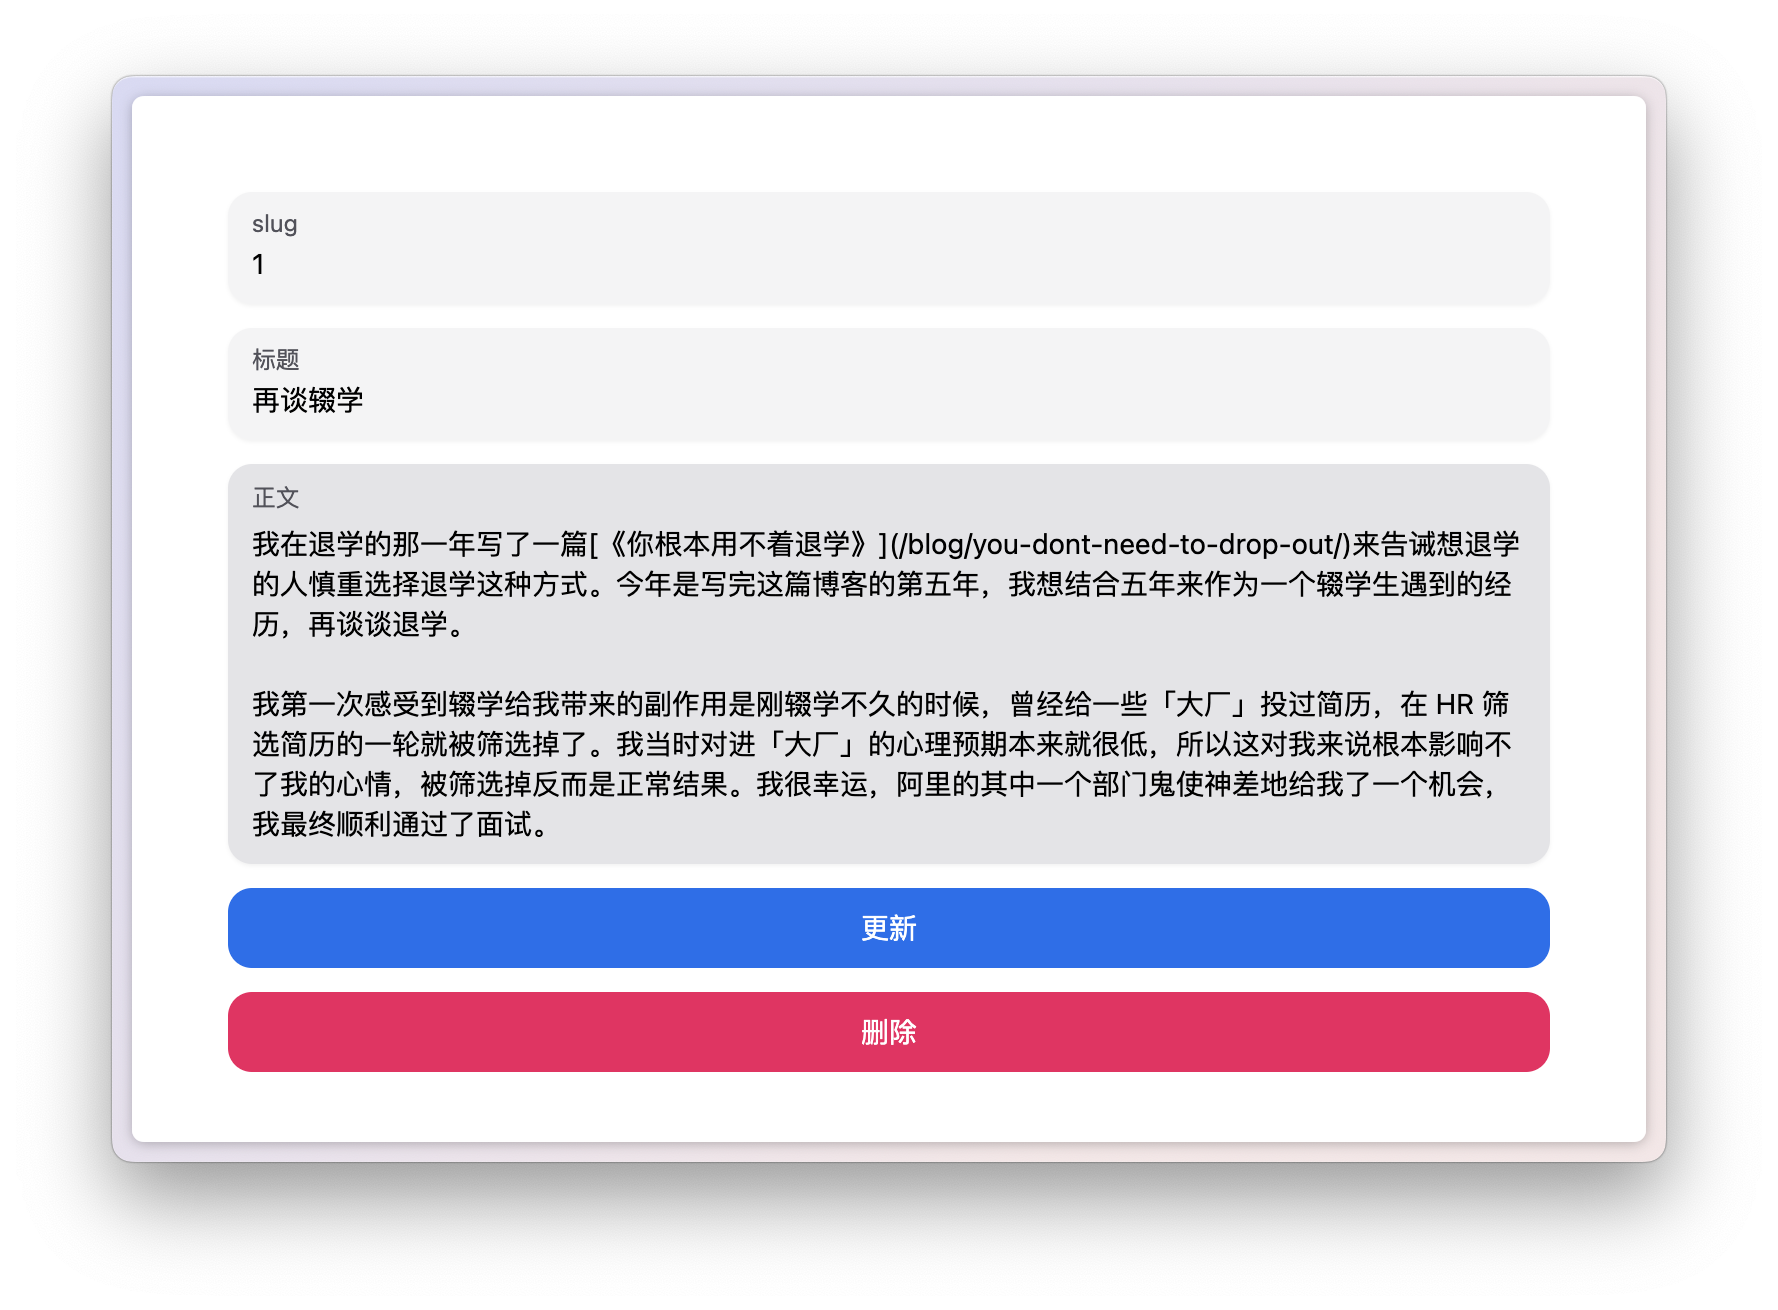
这本小书围绕一个博客系统进行对 Remix 的粗浅讲解,这个博客最终会实现的功能包括:
查看文章列表
发布、编辑、删除文章
用户登录、注册,编辑文章鉴权
新建 Remix 项目
初始化 Remix 项目
新建一个 Remix 项目,我推荐直接使用官方的 create-remix 工具而不是自己从头写起,因为官方的模板已经帮你写好了最佳实践中必要的代码(比如 hot reload),这些代码可以在熟悉 Remix 后再理解,不建议一开始就自己手写。
x1# pnpm 的用法2pnpm create remix@latest remix-blog3
4# npm 的用法5npx create-remix@latest remix-blog以上的命令意思是在当前目录新建一个 remix-blog 目录,初始化一个 Remix 项目。npm 和 pnpm 的用法有些差异,请读者自行选择。
创建目录后,进入 remix-blog, 安装依赖:
xxxxxxxxxx31pnpm i2# 或者3npm iRemix 项目结构一览
我们现在来看看这个目录的结构:
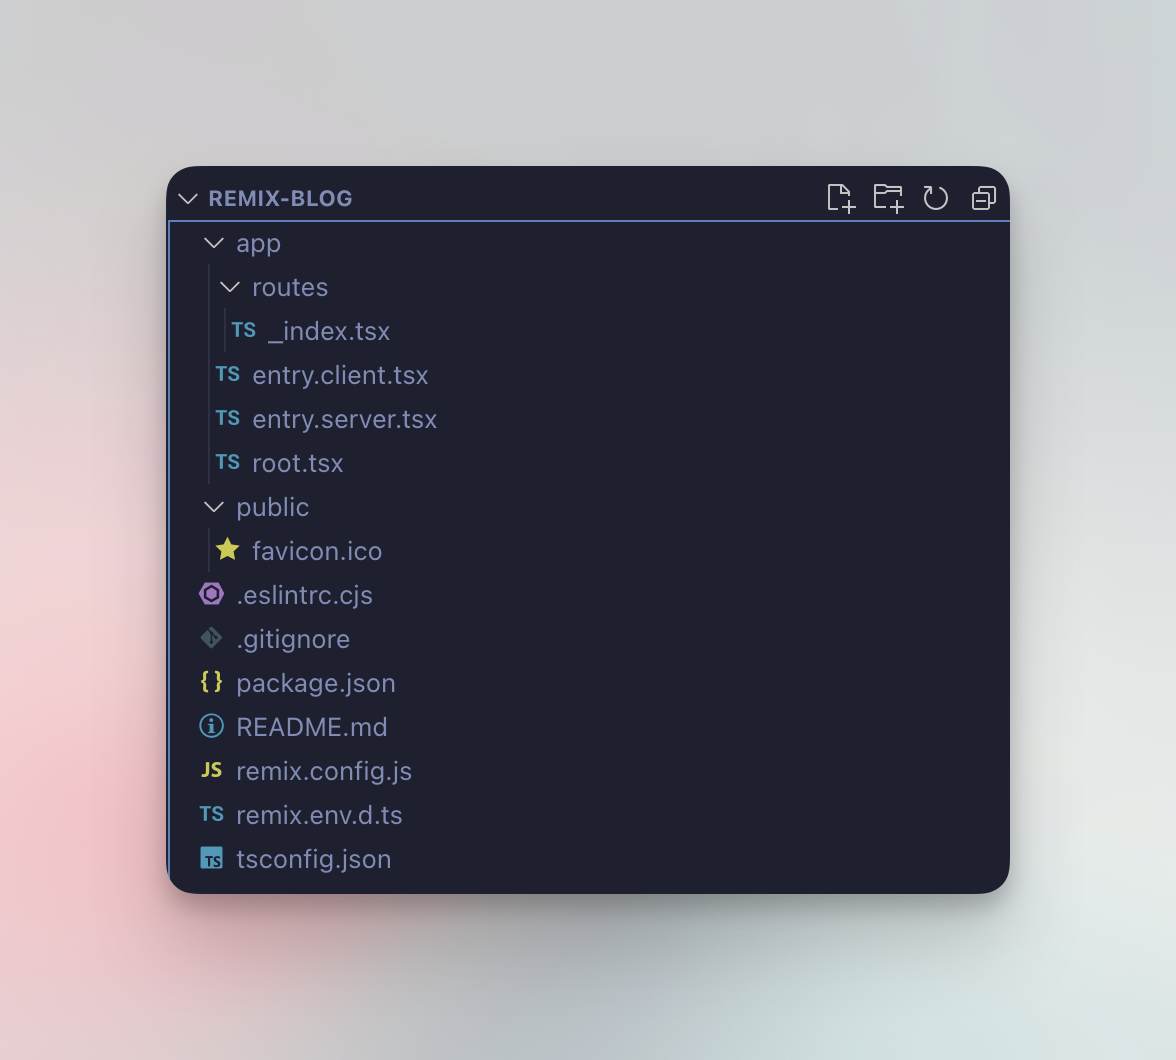
xxxxxxxxxx71- app2- routes3- _index.tsx4- entry.client.tsx5- entry.server.tsx6- root.tsx7- public
在 Remix 项目中,所有的业务代码主要在 app/ 文件夹中,public/ 用于存放外部直接可以访问的静态文件,比如 favicon.ico.
app/routes所有的页面、路由都在这个目录,如果你使用过 Next.js, 可以类比成 Next.js 中的app/或者pages/目录entry.client.tsx和entry.server.tsx我们不需要去管它们,这是模板里写好的一些 Remix 的固定逻辑,在日常开发我们一般不会动它root.tsx是整个 web app 的入口, 每一个页面都会继承这个入口作为 layout. 如果你使用过 Next.js, 可以类比成 Next.js 中的_document.tsx或_app.tsx
Remix 的路由设计
这一部分的代码不需要读者亲自动手写,只需理解即可。
现在,请先启动整个项目:
xxxxxxxxxx11npm run dev运行命令后,就可以打开 http://localhost:3000 看到初始化模板中写好的页面:
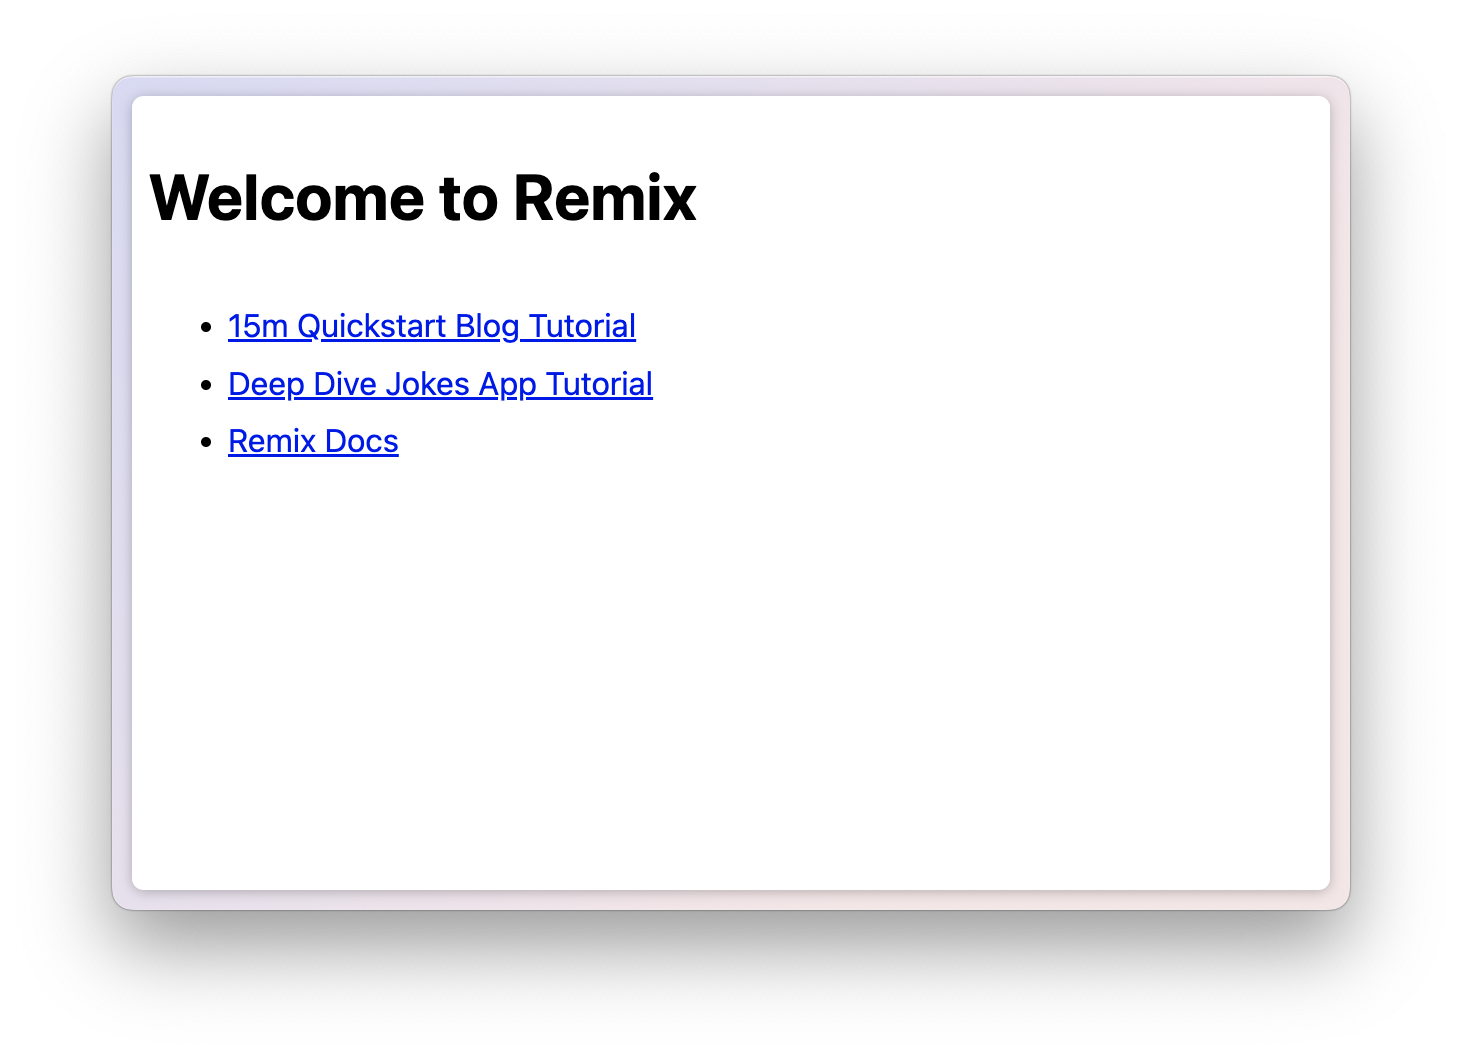
这一个页面,对应的就是 app/routes/_index.tsx 所写的 React 页面。
你可能会很奇怪,为什么在文件开头会有下划线(_)呢,这是因为在 Remix 中,页面路由会以文件名自动生成。所以,如果你写了一个 app/routes/index.tsx, 那么它会指向 localhost:3000/index 而不是 localhost:3000/.
在一个复杂的 web app 里,还会有很多不同的嵌套路由,比如:
/posts/:postId/tags/tags/:tagId
那么在 Remix 中,可以写成:
xxxxxxxxxx71- app2- routes3- _index.tsx4- posts.$postId.tsx5- tags._index.tsx6- tags.$tagId.tsx7- root.tsx
| url | 文件名 | 继承模板 |
|---|---|---|
| / | app/routes/_index.tsx | app/root.tsx |
| /posts/xxx | app/routes/posts.$postId.tsx | app/root.tsx |
| /tags | app/routes/tags._index.tsx | app/root.tsx |
| /tags/xxx | app/routes/tags.$tagId.tsx | app/root.tsx |
在有一些情况,你可能希望 /tags 和 tags/:tagId 用一套 tag 页面专用的模板,而不是继承 root.tsx, 那么你可以添加一个 app/routes/tags.tsx 文件作为父级 layout, 这样目录会变成:
xxxxxxxxxx81- app2- routes3- _index.tsx4- posts.$postId.tsx5- tags.tsx6- tags._index.tsx7- tags.$tagId.tsx8- root.tsx
这时,继承的对应关系变为:
| url | 文件名 | 继承模板 |
|---|---|---|
| / | app/routes/_index.tsx | app/root.tsx |
| /posts/xxx | app/routes/posts.$postId.tsx | app/root.tsx |
| /tags | app/routes/tags._index.tsx | app/routes/tags.tsx |
| /tags/xxx | app/routes/tags.$tagId.tsx | app/routes/tags.tsx |
而在作为 layout 的组件中,我们可以直接用 Remix 的 <Outlet> 组件把子路由引入进来(如果你使用过 React Router, 那么你对这个一定不陌生了):
xxxxxxxxxx121import { Outlet } from "@remix-run/react";2
3export default function TagLayout() {4  return (5    <div>6      <h1>Tag Layout</h1>7      <div>8        <Outlet />9      </div>10    </div>11  )12}
看到这里,你大概能理解为什么需要写成 _index 的形式了,因为任何不带 _index 的页面,都可以作为一个 layout 被继承。比如:
xxxxxxxxxx41app2- routes3- tags.tsx4- tags._index.tsx
这样的情况下,tags.tsx 是作为 layout 存在,而 tags._index.tsx 才是访问 /tags 时的页面。
关于 Remix 路由,可以在官方文档找到更详细的用法,本书只作浅显的讲解。
加入 Tailwind CSS
在写业务代码之前,我们还需要把样式引入进来,在这本书中,我们使用 TailwindCSS + NextUI 的方案。实际上,用什么 UI 库并不重要,本书将提到的跟 UI 库相关的操作(比如错误显示)都可以很容易应用到其它 UI 库中,读者只要理解其背后的逻辑即可。
接下来的部分读者应跟着书本内容一起操作
在项目根目录中,安装 Tailwind CSS 必要的依赖:
xxxxxxxxxx11pnpm i tailwindcss postcss autoprefixer然后用 tailwindcss 的 CLI 初始化 tailwindcss:
xxxxxxxxxx31pnpm exec tailwindcss init -p2# npm3npx tailwindcss init -p然后在创建一个 app/main.css 的 css 文件:
xxxxxxxxxx31@tailwind base;2@tailwind components;3@tailwind utilities;下一步,在 app/root.tsx 中引入 main.css. 请注意,在 Remix 中引入 css 并不是直接 import './main.css, 而是要在 app/root.tsx 中 export 出来的 links 函数中加入这个 css:
xxxxxxxxxx61+import mainCSS from './main.css'2
3export const links: LinksFunction = () => [4+ { rel: "stylesheet", href: mainCSS }, 5  ...(cssBundleHref ? [{ rel: "stylesheet", href: cssBundleHref }] : []),6];
到这里,tailwindcss 就已经可以在你的 Remix app 中使用了。
加入 NextUI
初始化 tailwindcss 后,安装 NextUI 必要的依赖
xxxxxxxxxx11pnpm i @nextui-org/react framer-motion然后在 tailwind.config.js 中引入 NextUI:
xxxxxxxxxx171// tailwind.config.js2const { nextui } = require("@nextui-org/react");3
4/** @type {import('tailwindcss').Config} */5module.exports = {6  content: [7    // 包含 Remix app 的所有页面8    "./app/**/*.tsx",9    // NextUI 的组件10    "./node_modules/@nextui-org/theme/dist/**/*.{js,ts,jsx,tsx}",11  ],12  theme: {13    extend: {},14  },15  darkMode: "class",16  plugins: [nextui()],17};
然后在 root.tsx 中加入 <NextUIProvider />, 注意是在 <Outlet /> 外面进行嵌套:
xxxxxxxxxx201export default function App() {2 return (3 <html lang="en">4 <head>5 <meta charSet="utf-8" />6 <meta name="viewport" content="width=device-width, initial-scale=1" />7 <Meta />8 <Links />9 </head>10 <body>11+ <NextUIProvider>12 <Outlet />13+ </NextUIProvider>14 <ScrollRestoration />15 <Scripts />16 <LiveReload />17 </body>18 </html>19 );20}无论你用的是什么 UI 库,一般来说你都应该在这个地方套用 UI 库提供的 Provider.
另外,如果你用的是 pnpm, 则需要以下步骤:
在根目录创建 .npmrc 文件:
xxxxxxxxxx11public-hoist-pattern[]=*@nextui-org/*重新安装依赖:
xxxxxxxxxx11pnpm i到这里,NextUI 也安装完毕了。
数据库设计
这一章开始,我们正式开始开发博客系统。在写任何业务代码之前,我认为首先需要想清楚应该如何设计数据库,因为很多应用本质上就是对数据的增删查改。
对于本书要开发的博客系统来说,数据库模型不复杂。首先我们需要整理出我们要做的功能:
浏览博客文章列表
创建、修改、删除文章
根据这样的需求,其实我们只需要一张数据表就可以了。本书会使用 Prisma 作为 ORM 工具对数据库进行读写,本人所有的项目都在使用。选择 Prisma 是因为对我来说,Prisma 的 Schema 易懂易写,对 TypeScript 的支持也非常好,在写代码时有充分的类型提示。
即使读者没有使用过 Prisma, 应该也能读懂 Prisma 使用的 API, 比如 findMany(), findUnique(), update(), delete(), 不需要深厚的 SQL 功底。
加入 Prisma
安装 Prisma:
xxxxxxxxxx11pnpm i prisma @prisma/client在项目中初始化 prisma:
xxxxxxxxxx31pnpm exec prisma init2# 或者 npm3npx prisma init运行命令后,会创建一个 prisma/ 目录,里面有 prisma/schema.prisma 文件,就是我们需要编写的数据库模型文件。
把数据库模型写成 schema
打开 prisma/schema.prisma 文件,你会看到:
xxxxxxxxxx111// This is your Prisma schema file,2// learn more about it in the docs: https://pris.ly/d/prisma-schema3
4generator client {5  provider = "prisma-client-js"6}7
8datasource db {9  provider = "postgresql"10  url      = env("DATABASE_URL")11}
这是初始化 prisma 时的默认模板,我们需要修改一个地方,因为在我们为了方便,不使用 postgresql, 而使用本地的数据库 sqlite, 所以我们要把 provider 改成 sqlite 以及定义数据库文件的地址:
xxxxxxxxxx111// This is your Prisma schema file,2// learn more about it in the docs: https://pris.ly/d/prisma-schema3
4generator client {5  provider = "prisma-client-js"6}7
8datasource db {9+ provider = "sqlite"10+ url      = "file:./data.db"11}
接下来,我们开始编写数据库的模型。我们现在只需要一张 Post 表来存储博客文章,每个 post 有以下属性:
id文章的唯一 IDtitle文章标题content文章内容created_at文章创建时间
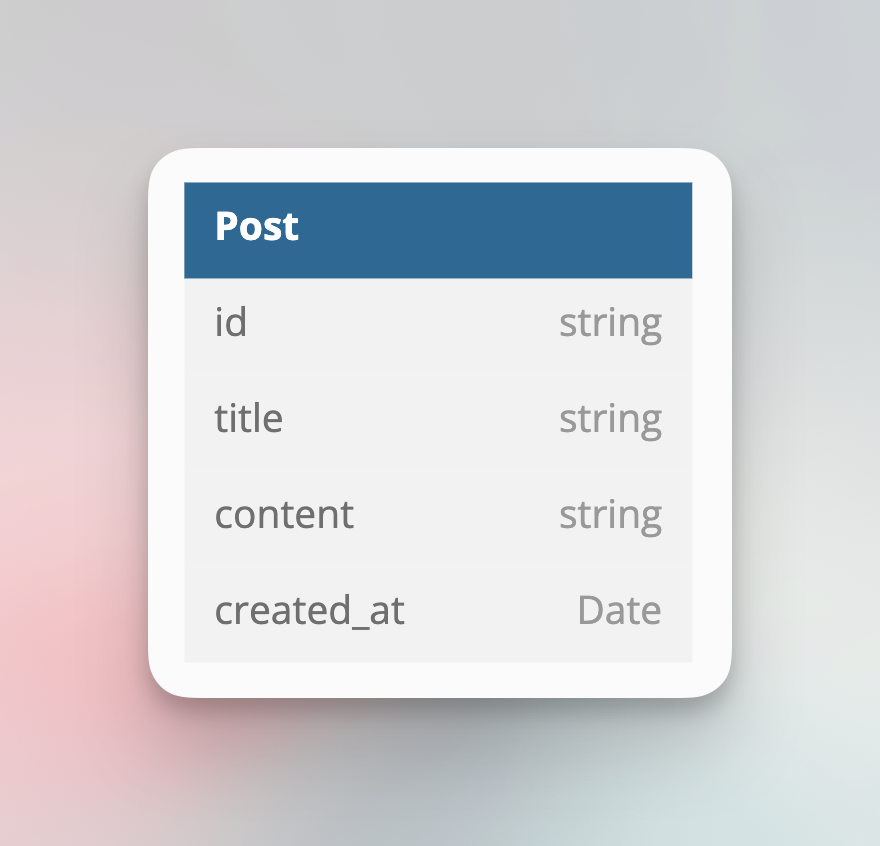
那么在 prisma 的 schema 中,我们可以写成:
xxxxxxxxxx161generator client {3provider = "prisma-client-js"4}5datasource db {7provider = "sqlite"8url = "file:./data.db"9}10model Post {12id String @id13title String14content String15created_at DateTime @default(now())16}
对于这样的 schema, 我想应该不用多作解释,光看字面已经差不多理解它表达的意思:定义了一个 Post model (也就是数据表),以及对它的属性进行了类型定义。
@id用于指定它作为索引值@defualt用于指定它的默认值,这里为now(), 那么在创建数据的时候会以当前时间为默认值
写好 schema 后,我们可以运行:
xxxxxxxxxx31pnpm exec prisma db push2# 或 npm3npx prisma db push这个命令会使 prisma 根据 schema 创建或更新现有的数据库,并且生成对应的 TypeScript 类型。这时你会看到 prisma/data.db sqlite 数据库文件已经被创建了。
在 Remix 项目中引入 Prisma
数据库的准备工作已经完成,现在就来准备在 Node.js 中使用它了。创建一个 app/prisma.server.ts 文件:
xxxxxxxxxx111// app/prisma.server.ts2
3import { PrismaClient } from "@prisma/client"4declare global {5  var __prisma: PrismaClient6}7if (!global.__prisma) {8  global.__prisma = new PrismaClient()9}10global.__prisma.$connect()11export const prisma = global.__prisma
为什么这么复杂?其实本质上使用 prisma 只需要 const prisma = new PrismaClient(), 然后在其它地方使用 prisma 这个实例就可以。但因为在开发阶段会有 hot reload, 所以有可能会导致 PrismaClient 被多次初始化,造成数据库链接过多的问题,所以实际上这个写法是实现了一个单例 (singleton),防止 PrismaClient 被多次初始化。
为什么文件要以 .server.ts 结尾?因为这样可以让 Remix 知道这是仅限于服务端使用的文件,虽然 Remix 可以自动识别出哪些文件不应该被打包到前端文件,但这样做可以百分百避免被误打包。建议读者保持这个习惯。
到这里,数据库的准备也已经完成。
第一个页面:发布文章
现在我们终于完成了所有的准备工作,正式开始开发第一个页面。
由于现在数据库什么都没有,也没有可以展示的东西,所以我们第一个页面,就来写发布文章。
我们希望用户访问 /posts/new 时能进入这个发布文章的页面,所以我们创建一个路由文件 app/routes/posts.new.tsx:
xxxxxxxxxx51* app2 * routes3 * _index.tsx4+ * posts.new.tsx5 * root.tsxxxxxxxxxxx91// app/routes/posts.new.tsx2
3export default function Page() {4 return (5 <div>6 New post7 </div>8 )9}
保存后,访问 http://localhost:3000/posts/new 可以看到创建的页面。
要发布文章,我们自然是要写几个 input 来输入数据:
xxxxxxxxxx191// app/routes/posts.new.tsx2
3import { Button, Input, Textarea } from "@nextui-org/react";4
5export default function Page() {6  return (7    <div>8      <div className="flex flex-col gap-3 p-12">9        <h1 className="text-xl font-black">发布文章</h1>10        <Input name="slug" label="slug" />11        <Input label="文章标题" />12        <Textarea label="内容" />13        <Button>14          发布15        </Button>16      </div>17    </div>18  )19}
用 tailwindcss 的好处就是读者可以直接从 className 读出我写的样式,不需要另外创建 css
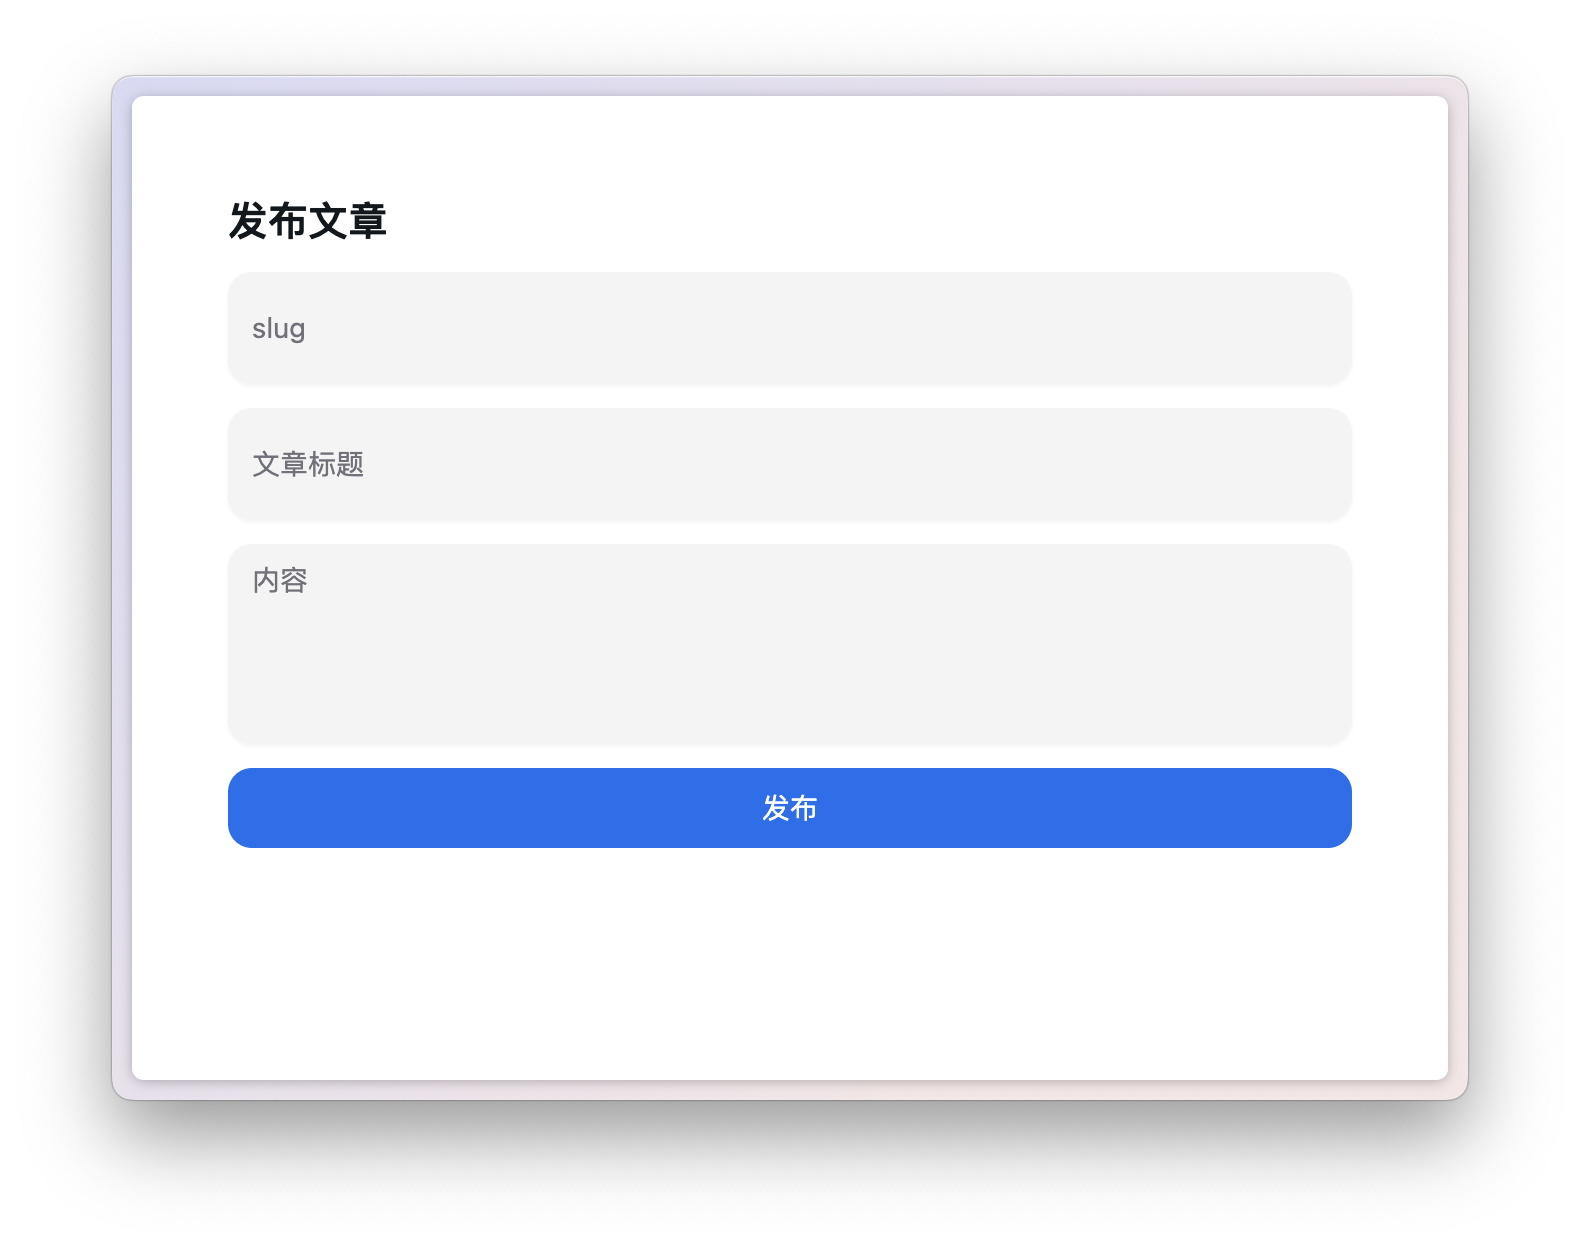
现在有了一个大致的 UI 让我们发布文章,那我们到底要怎么把数据请求到后端呢?我们思考一下,不论你是用 Next.js (pages router) 或者纯前端 React 应用,你会怎么做?
可能我们惯用的方法,是用 useState(), 去获得两个 input 的内容,然后在 button onClick 的时候请求 api, 例如:
xxxxxxxxxx341// 示例代码,无须跟写2
3import { Button, Input, Textarea } from "@nextui-org/react";4import { useState } from "react";5
6export default function Page() {7  const [title, setTitle] = useState('');8  const [content, setContent] = useState('');9
10  return (11    <div>12      <div className="flex flex-col gap-3 p-12">13        <h1 className="text-xl font-black">发布文章</h1>14        <Input label="文章标题" value={title} onChange={_ => {15          setTitle(_.target.value);16        }} />17        <Textarea value={content} onChange={_ => {18          setContent(_.target.value);19        }} label="内容" />20        <Button onClick={_ => {21          fetch("api/create", {22            method: "POST",23            body: JSON.stringify({24              title,25              content26            })27          })28        }} color="primary">29          发布30        </Button>31      </div>32    </div>33  )34}
当表单更复杂的时候,我们甚至还需要借助 react-hooks-form 这样的库帮我们省点代码。
我们还需要单独在服务端开一个 /api/create 的路由,来接受请求,进行数据库读写。
我们再回想一下,在最古老的年代,我们是怎么提交表单的?
xxxxxxxxxx211// 示例代码,无须跟写2
3import { Button, Input, Textarea } from "@nextui-org/react";4
5export default function Page() {6  return (7    <div>8      <div className="flex flex-col gap-3 p-12">9        <h1 className="text-xl font-black">发布文章</h1>10        <form method="POST">11          <Input name="slug" label="slug" />12          <Input name="title" label="文章标题" />13          <Textarea name="content" label="内容" />14          <Button type="submit" color="primary">15            发布16          </Button>17        </form>18      </div>19    </div>20  )21}
没有 state, 没有 onClick, 点击按钮就会发送 POST 请求把 input 的数据带上,请求给当前页面 /posts/new. 在服务端,只要根据 form 表单中的数据的 name 就能提取对应的表单值。是不是看着非常轻松。前后端分离发展到今天,可能已经很多人忘记 <form> 是怎么用的了。
庆幸的是,这就是 Remix 里提交表单的方式。朴实、无华。
返璞归真:重新认识 Form 表单
我们改写一下我们写的页面:
xxxxxxxxxx231// app/routes/posts.new.tsx2
3import { Button, Input, Textarea } from "@nextui-org/react";4import { Form } from "@remix-run/react";5
6export default function Page() {7
8  return (9    <div>10      <Form method="POST">11        <div className="flex flex-col gap-3 p-12">12          <h1 className="text-xl font-black">发布文章</h1>13          <Input name="slug" label="slug" />14          <Input name="title" label="文章标题" />15          <Textarea name="content" label="内容" />16          <Button type="submit" color="primary">17            发布18          </Button>19        </div>20      </Form>21    </div>22  )23}
我们用 Remix 提供的 <Form /> 组件套住了我们的表单,给 input 和 textarea 分别填写了 name 属性。
<Form /> 和 HTML 标准的 <form> 的使用方法没有区别,只是 Remix 做了一些内部的工作。当我们点击「发布」按钮,表单会用 POST 方法请求当前的地址 /posts/new (因为我们没有在 form 中提供 action 属性指定 URL).
但如果我们现在点击按钮,会出现 405 错误,因为服务端不知道如何处理 POST 请求。所以接下来,我们就要处理这个请求。
理解 Remix 中的路由(Route Modules)
要如何处理打到路由上的请求呢?这时我们要理解 Remix 的路由文件的设定。在 Remix 中,每个在 app/routes 中的文件都是一个 route module, 每个 route module 可以 export 不同的东西。
首先是我们最常用的,export default 一个 React 组件,如果一个 route module 有 export default 一个 React 组件,那么当用户访问这个路由时,就会看到这个 React 组件。
然后就是 loader, 如果你 export 一个叫 loader 的函数,那么在进入页面渲染 React 组件之前,会先调用这个函数。这个函数返回的数据,可以在 React 组件中使用。如果你使用过 Next.js, 可以把它类比成 getServerSideProps.
还有 action, 如果你 export 一个叫 action 的函数,那么在这个路由被 GET 以外的请求打到时,会执行这个函数。
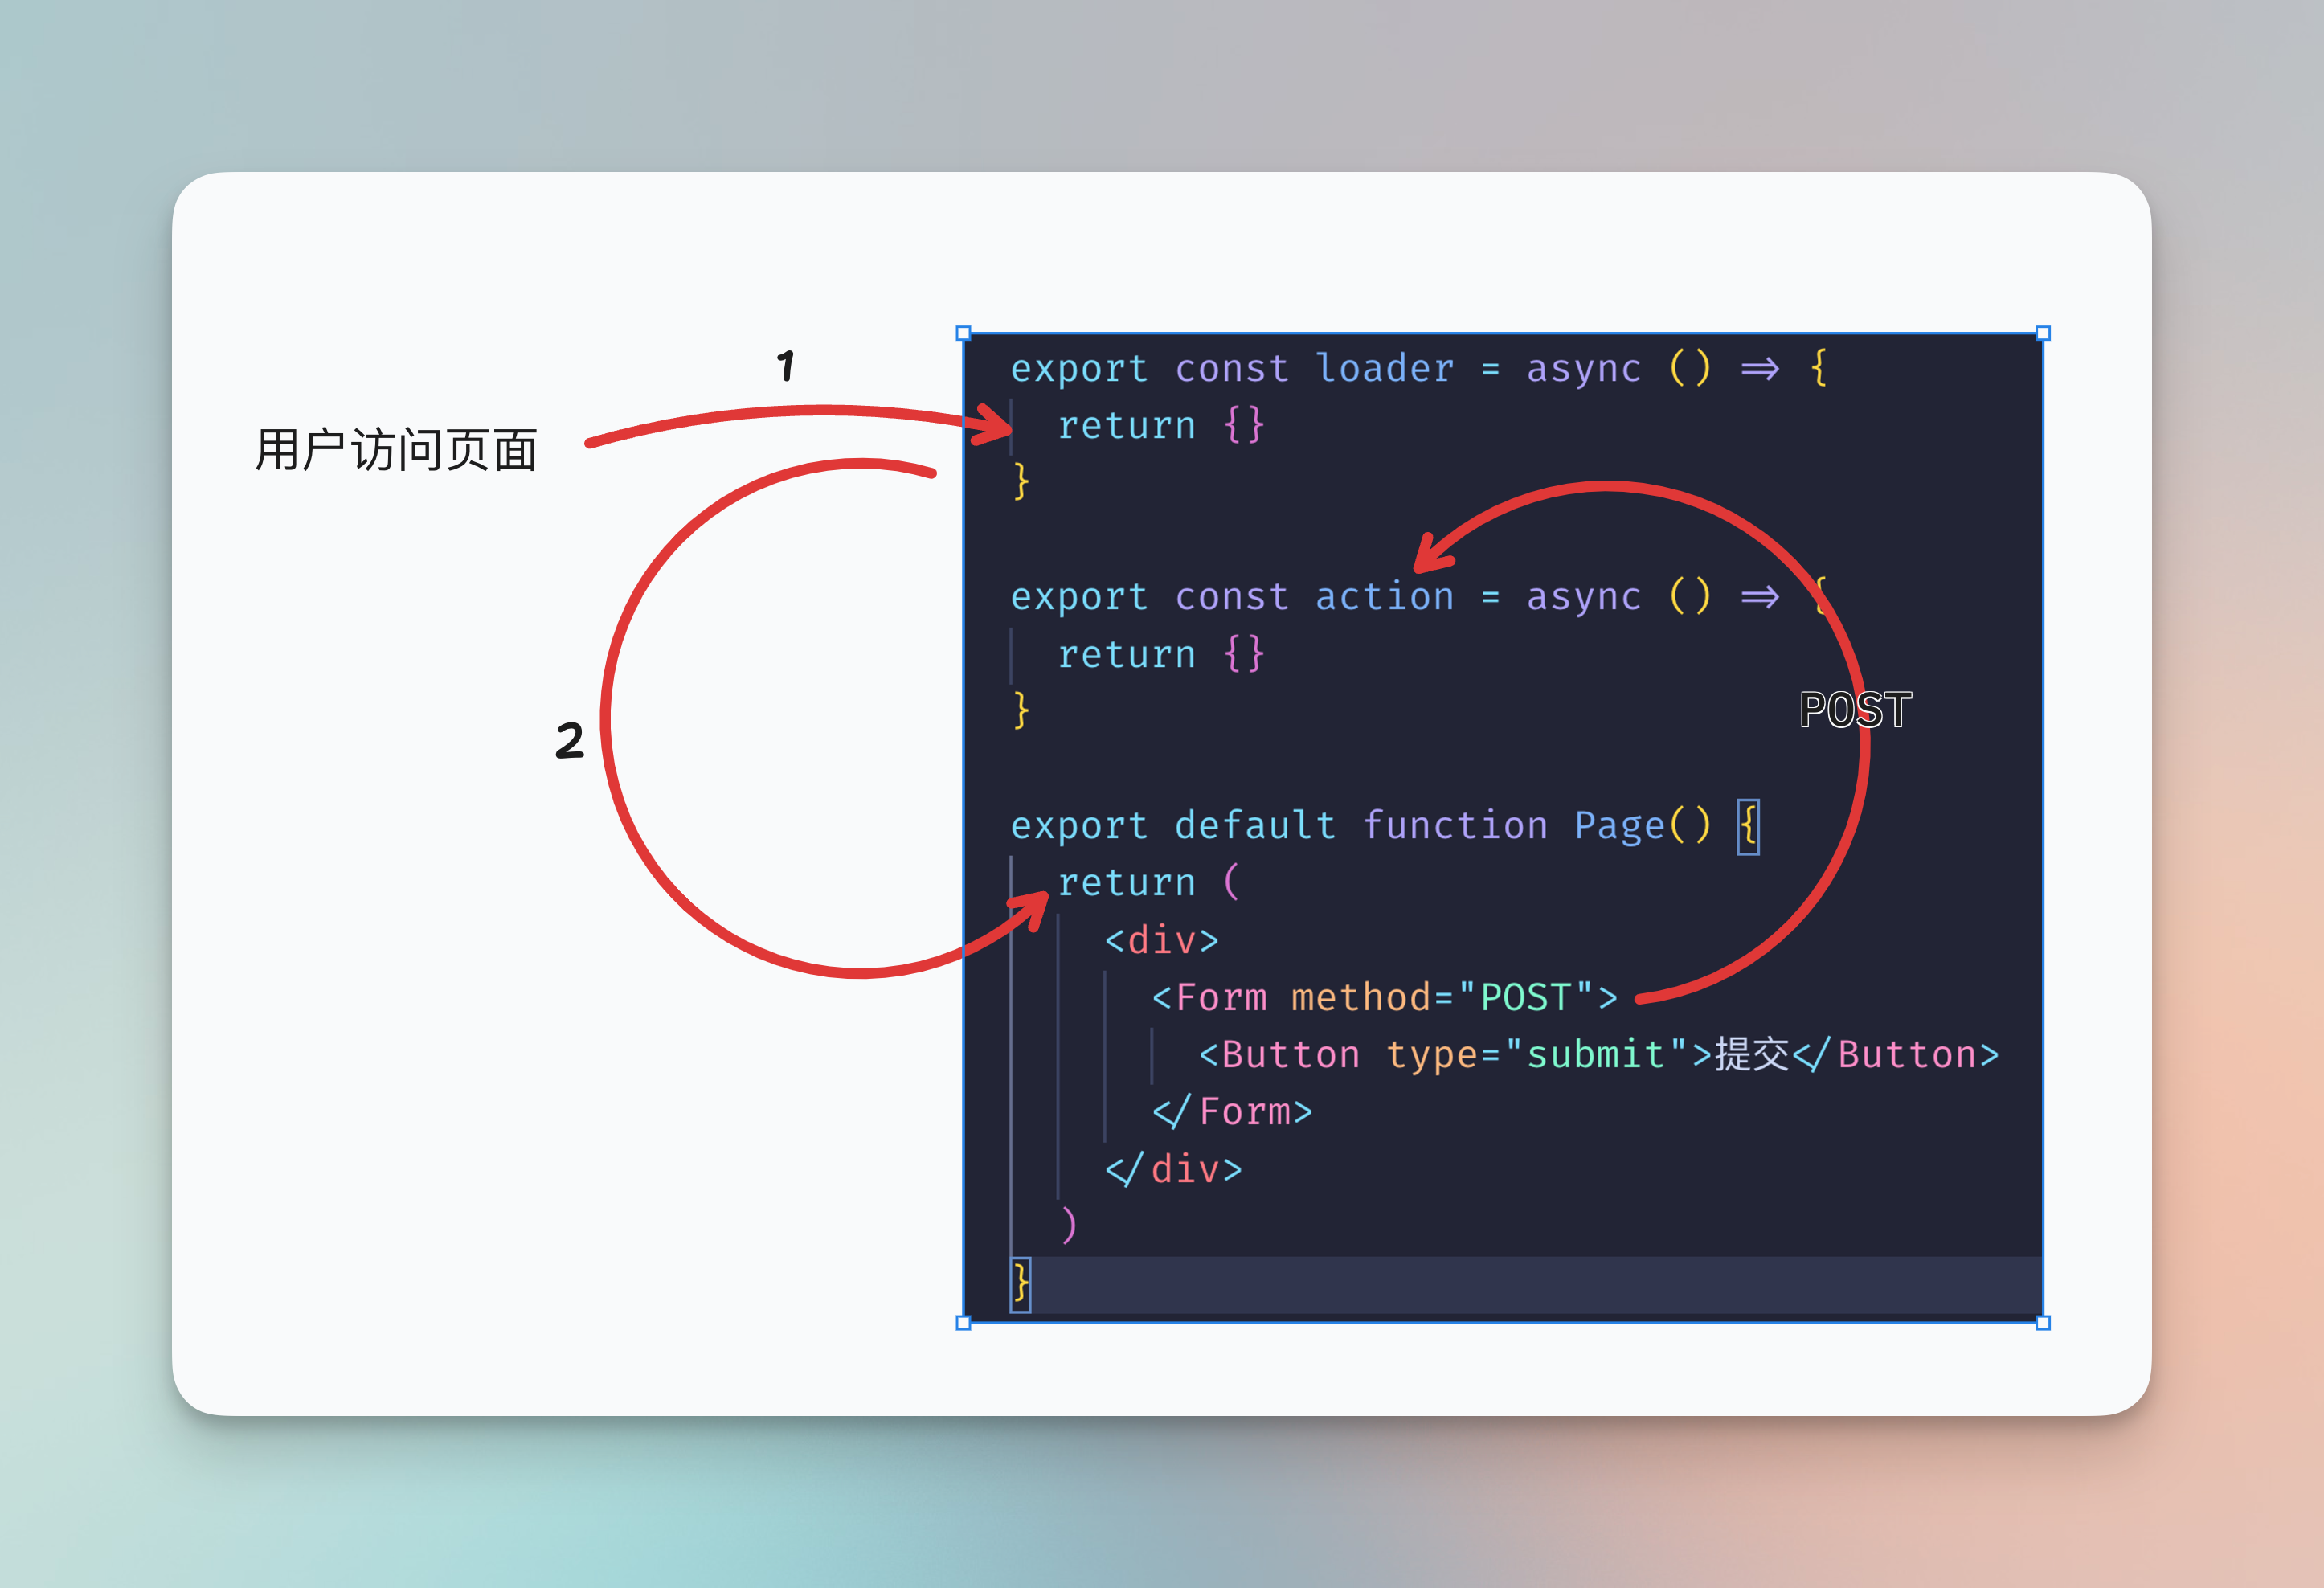
当然,route module 还可以有其它很多不同的功能,我们在接下来会提到其它的一些。
理解了 route modules 后,我们就可以给发布文章页面写数据库逻辑了:我们需要在当前页面 export 一个 action, 当用户提交 POST 请求时,获取表单信息,写入数据库:
xxxxxxxxxx451// app/routes/posts.new.tsx2
3import { Button, Input, Textarea } from "@nextui-org/react";4import { ActionFunctionArgs, redirect } from "@remix-run/node";5import { Form } from "@remix-run/react";6import { prisma } from "~/prisma.server";7
8export const action = async (c: ActionFunctionArgs) => {9  // 使用 `formData()` 获取表单数据10  const formData = await c.request.formData()11
12  const slug = formData.get('slug') as string13  const title = formData.get("title") as string14  const content = formData.get("content") as string15
16  // 在数据库创建记录17  await prisma.post.create({18    data: {19      id: slug, 20      title,21      content22    }23  })24
25  // 成功后跳转到首页26  return redirect("/")27}28
29export default function Page() {30  return (31    <div>32      <Form method="POST">33        <div className="flex flex-col gap-3 p-12">34          <h1 className="text-xl font-black">发布文章</h1>35          <Input name="slug" label="slug" />36          <Input name="title" label="文章标题" />37          <Textarea name="content" label="内容" />38          <Button type="submit" color="primary">39            发布40          </Button>41        </div>42      </Form>43    </div>44  )45}
在上面的代码中,可以看到我们 export 了 action函数,当点击「发布」按钮时,请求会打到这个函数当中。
在 action 函数中,第一个参数是 Remix 提供给我们用的上下文(我把这个参数用 c 命名),我们用 c.request.formData() 能拿到提交上来的表单数据。然后用 formData.get() 可以分别获取不同 name 的表单值。
拿到表单值以后,我们使用 prisma.create() 在数据库中创建一条记录。
最后,每个 action 都需要返回一个响应对象,这里我们使用了 redirect(), 是 Remix 提供的响应一个跳转的便捷函数。用户在发布完文章后,会自动跳转到首页(/).
表单验证
我们需要给用户提交的数据进行验证,比如数据不能为空。在 Remix 中,具体的步骤是:
在
action里对 formData 进行校验,如果校验不通过,响应一个 json, 里面包含错误信息在 React 中,接收
action的响应,当带有错误信息时,展示到页面上
因此,我们的 action 可以改写为:
xxxxxxxxxx501// app/routes/posts.new.tsx2
3export const action = async (c: ActionFunctionArgs) => {4  const formData = await c.request.formData()5
6  const slug = formData.get('slug') as string7  const title = formData.get("title") as string8  const content = formData.get("content") as string9
10  if (!slug) {11    return json({12      success: false,13      errors: {14        slug: "必须填写 slug",15        title: "",16        content: ""17      }18    })19  }20  if (!title) {21    return json({22      success: false,23      errors: {24        slug: "",25        title: "必须填写标题",26        content: ""27      }28    })29  }30  if (!content) {31    return json({32      success: false,33      errors: {34        slug: "",35        title: "",36        content: "必须填写内容"37      }38    })39  }40
41  await prisma.post.create({42    data: {43      id: slug,44      title,45      content46    }47  })48
49  return redirect("/")50}
可以看到,我们用 Remix 自带的 json() 函数在校验出问题时响应一个 json 对象给前端。在这里我响应的是这样的一个结构:
xxxxxxxxxx81{2 success: false,3 errors: {4 title: "",5 content: "",6 slug: ""7 }8}这个结构可以按照自己的喜好定义,只要前端按照这个结构进行处理即可。比如这一个结构,前端就可以判断 errors 里面每个属性名是否带有错误信息字符串,即可判断出是否有错误。
前端如何得到 action 响应的数据呢?可以使用 Remix 提供的一个 Rect hook useActionData 获取:
xxxxxxxxxx231// app/routes/posts.new.tsx2
3export default function Page() {4
5  const actionData = useActionData<typeof action>()6  const errors = actionData?.errors7
8  return (9    <div>10      <Form method="POST">11        <div className="flex flex-col gap-3 p-12">12          <h1 className="text-xl font-black">发布文章</h1>13          <Input isInvalid={!!errors?.slug} errorMessage={errors?.slug} name="slug" label="slug" />14          <Input isInvalid={!!errors?.title} errorMessage={errors?.title} name="title" label="文章标题" />15          <Textarea isInvalid={!!errors?.content} errorMessage={errors?.content} name="content" label="内容" />16          <Button type="submit" color="primary">17            发布18          </Button>19        </div>20      </Form>21    </div>22  )23}
在 NextUI 的 Input 组件里,只需要提供 isInvalid 和 errorMessage 就可以展示表单项错误的样式。如果你使用其它 UI 库,则需要查看对应的文档。
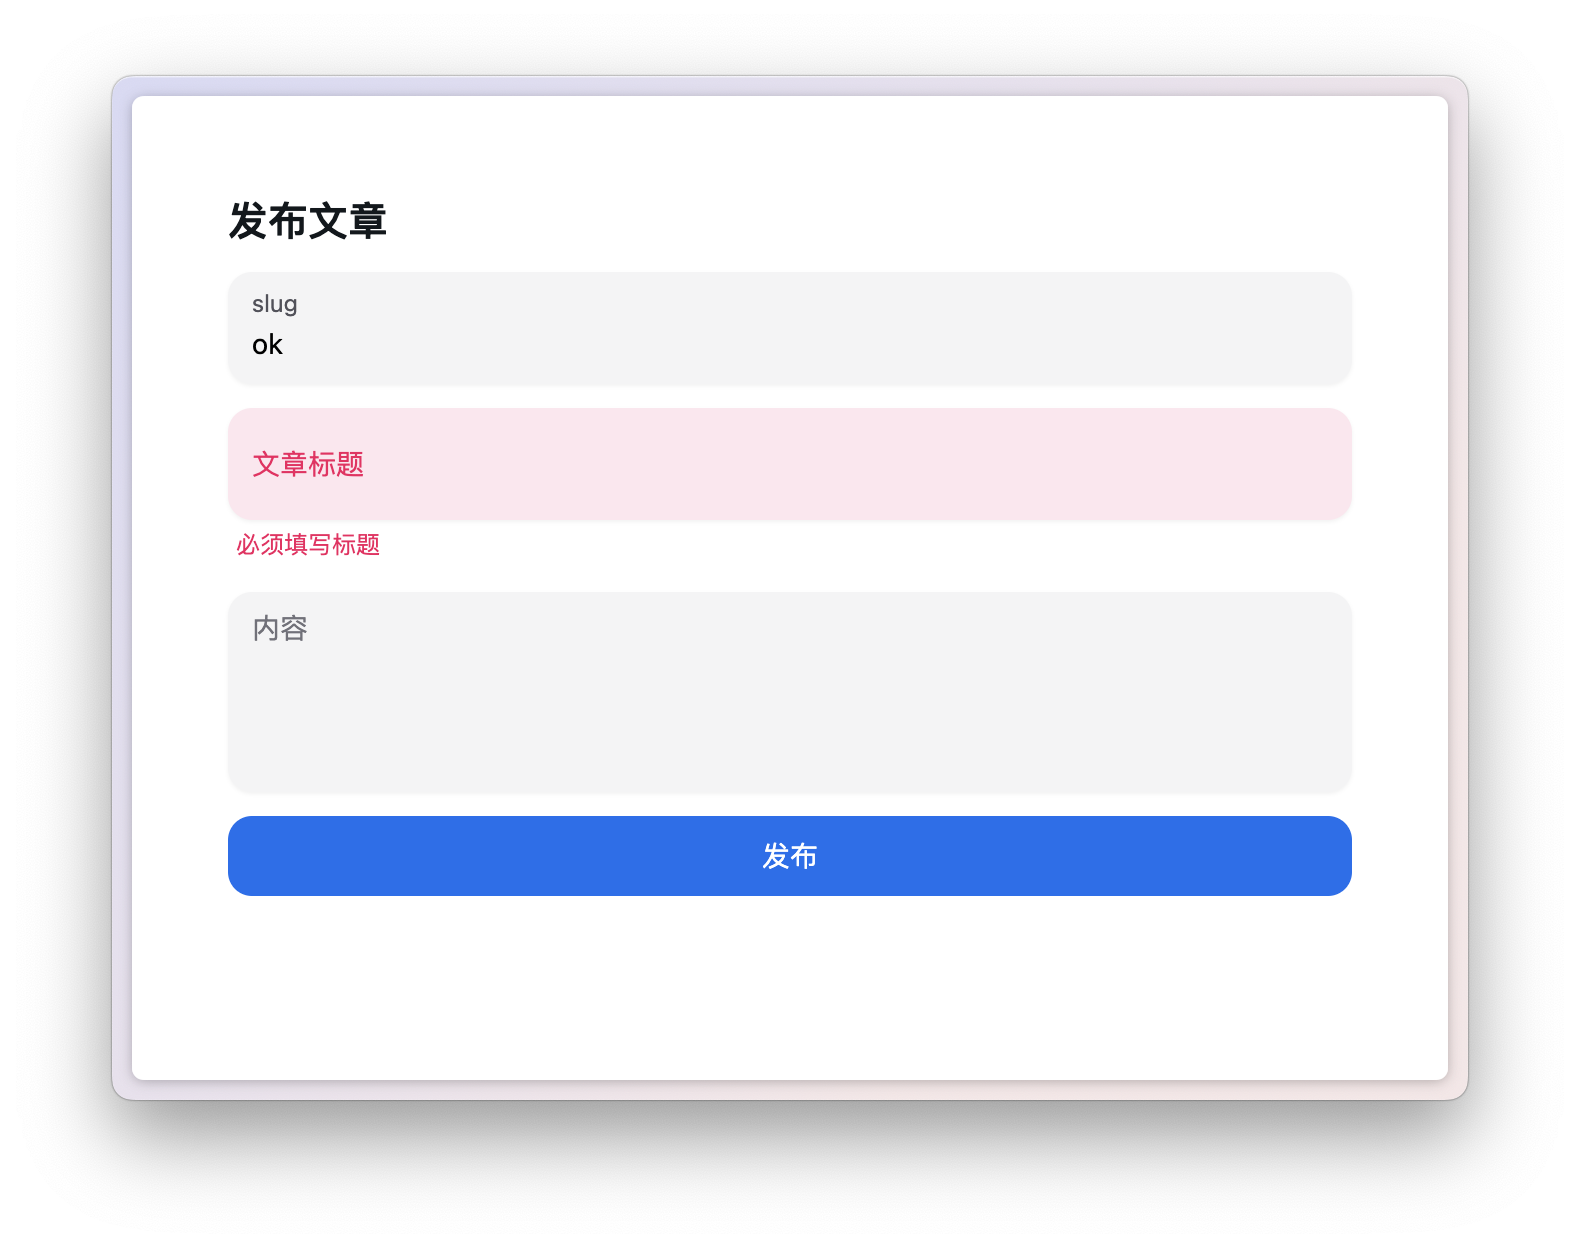
现在试试在发布文章页面传一些空值,可以看到可以正常显示错误信息了。
获取 loading 状态
直接用 <form>/<Form> POST 请求有一个不好的地方是用户无法感知加载的状态,如果网络慢,用户不知道是否已经成功提交表单,所以我们需要在前端显示 loading 的状态,告诉用户正在请求。
要获取请求的状态,我们可以使用 Remix 提供的 useNavigation hook, 这个 hook 可以获取所有 Form 表单请求的状态:
xxxxxxxxxx251// app/routes/posts.new.tsx2
3export default function Page() {4
5  const actionData = useActionData<typeof action>()6  const errors = actionData?.errors7
8+ const navigation = useNavigation()9
10  return (11    <div>12      <Form method="POST">13        <div className="flex flex-col gap-3 p-12">14          <h1 className="text-xl font-black">发布文章</h1>15          <Input isInvalid={!!errors?.slug} errorMessage={errors?.slug} name="slug" label="slug" />16          <Input isInvalid={!!errors?.title} errorMessage={errors?.title} name="title" label="文章标题" />17          <Textarea isInvalid={!!errors?.content} errorMessage={errors?.content} name="content" label="内容" />18+         <Button isLoading={navigation.state === 'submitting'} type="submit" color="primary">19            发布20          </Button>21        </div>22      </Form>23    </div>24  )25}
我们用 navigation.state 来判断表单的状态,当值为 submitting 时,证明表单正在提交。
注意,因为 useNavigation 会监听所有组件内的 Form 表单状态,所以如果当你的页面同时有多个 Form 表单时,不能单纯地通过 navigation.state === 'submitting' 来判断当前表单是否正在加载,还需要通过 navigation.formAction 来判断这个状态是来自于哪个表单。
比如:
xxxxxxxxxx61<Form method="POST" action="/one">2 <Button isLoading={navigation.state === 'loading' && navigation.formAction === '/one'} type="submit">第一个表单</Button>3</Form>4<Form method="POST" action="/two">5 <Button isLoading={navigation.state === 'loading' && navigation.formAction === '/two'} type="submit">第二个表单</Button>6</Form>关于 useNavigation 可以查看官方详细的文档说明
第二个页面:首页
我们已经发布了一些页面,现在可以着手开始写首页,展示文章列表。
要在页面展示文章列表,正如之前的内容提到的,我们可以使用 route module 中的 action, 用 prisma 获取数据库中的所有 post 记录,响应给页面组件。
数据加载
进入 app/routes/_index.tsx 文件,删除模板自带的页面内容,加上 loader:
xxxxxxxxxx131// app/routes/_index.tsx2
3export const loader = async (c: LoaderFunctionArgs) => {4  const posts = await prisma.post.findMany({5    orderBy: {6      created_at: "desc"7    }8  })9
10  return json({11    posts12  })13}
我们用 prisma 的 findMany()获取列表,然后用 orderBy 根据文章创建日期 (created_at) 进行排序。和 action 一样,我们用 json() 来响应一个 json 对象给页面组件。
在页面组件,我们可以用 useLoaderData() 这个 hook 来取得 loader 返回的 json 数据:
xxxxxxxxxx261// app/routes/_index.tsx2
3import { Link, useLoaderData } from "@remix-run/react";4
5export default function Index() {6  const loaderData = useLoaderData<typeof loader>()7
8  return (9    <div>10      <div className="p-12 flex flex-col gap-4">11        {loaderData.posts.map(post => {12          return (13            <div key={post.id}>14              <Link to={`/posts/${post.id}`} className="text-xl">15                {post.title}16              </Link>17              <div className="text-sm text-gray-400">18                {post.created_at}19              </div>20            </div>21          )22        })}23      </div>24    </div>25  );26}
我们还使用了 Remix 提供的<Link />组件而不是<a /> 标签做超链接,因为前者可以提供更多功能,比如,我们可以给 <Link> 组件设置 prefetch 的机制,使在某些行为被触发时提前渲染这个链接的内容,从而加快访问速度:
<Link prefetch="intent">用户光标移动到链接上的时候进行渲染<Link prefetch="render">组件被渲染的时候进行渲染<Link prefetch="viewport">组件进入到视野时进行渲染
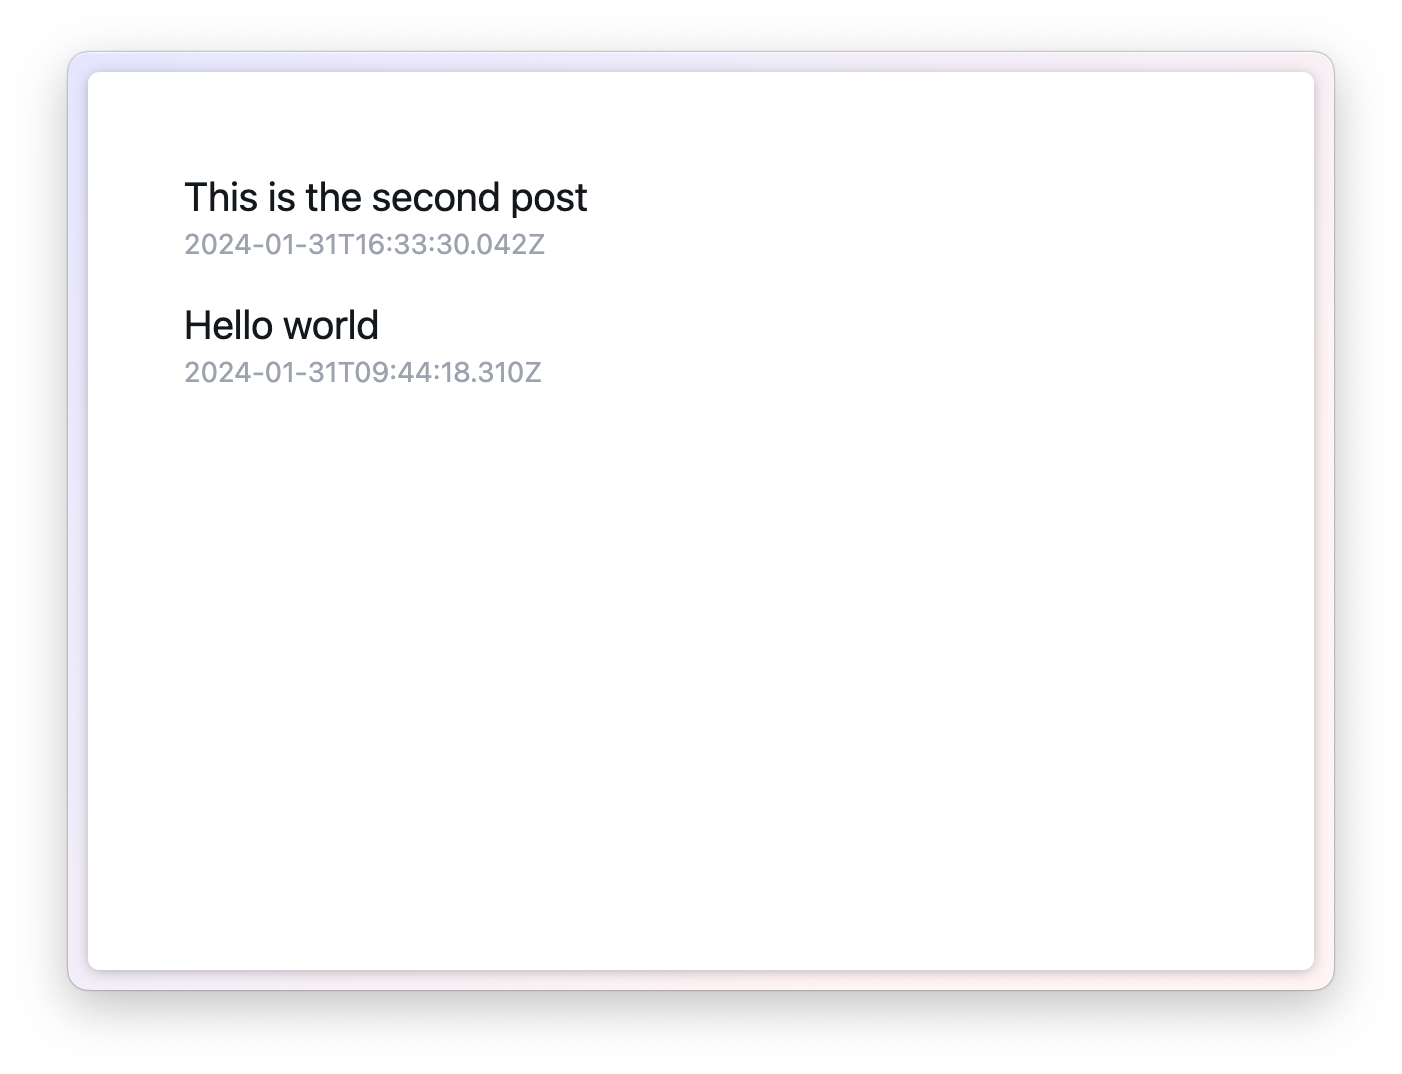
现在访问 http://localhost:3000, 即可看到刚刚我们发布的文章列表。
分页 (pagination) 的实现
文章列表展示,当文章量变多时,通常会涉及到分页。我们在这里首先思考一下,通常我们的做法是什么?
一个常用的做法,就是写一个分页组件,当用户点击页数时,把页数传给后端接口,重新获取数据,例如:
xxxxxxxxxx171// 示例代码,无需跟写2
3import React from "react";4import {Pagination} from "@nextui-org/react";5
6export default function App() {7  const [posts, setPosts] = React.useState([])8  return (9    <Pagination total={10} initialPage={1} onChange={async page => {10       const result = await fetch(`/api/posts?page=${page}`, {11         method: "POST"12       })13       const posts = await result.json()14       setPosts(posts)15    }} />16  );17}
可以看到,我们首先需要用一个 useState 来保存文章列表,在分页组件的 onChange 事件中重新写请求 API 逻辑。
而在 Remix, 我们没有 API 接口,数据的请求都在 loader 中。所以如果我们实现分页的方法,是直接改变当前页面的 search params.当我们修改页面的 search params 时,Remix 会自动重新触发 loader, 这样一来,新的数据就会自动响应给页面,我们不需要做任何的状态管理。
比如,我们的文章页面是 localhost:3000, 当 URL 变成 localhost:3000?page=2 的时候,loader 就会重新被触发。在 loader 中,我们可以用 new URL(c.request.url) 这个 Web 标准方法获取 URL 中的 search params:
xxxxxxxxxx161// app/routes/_index.tsx2
3export const loader = async (c: LoaderFunctionArgs) => {4  const search = new URL(c.request.url).searchParams5  const page = Number(search.get('page') || 1)6
7  const posts = await prisma.post.findMany({8    orderBy: {9      created_at: "desc"10    }11  })12
13  return json({14    posts15  })16}
拿到页数,我们就可以用页数去查询数据库了。
首先我们写死一个每页数据量(page size),在这里为了方便,我们设置为 1,这样我们就算数据量很少都能测试到分页。
然后我们还需要做一个额外的查询,查询出文章的总数除以 page size, 得到一共有多少页,这样分页组件能知道显示多少页。
xxxxxxxxxx251// app/routes/_index.tsx2
3const PAGE_SIZE = 14export const loader = async (c: LoaderFunctionArgs) => {5  const search = new URL(c.request.url).searchParams6  const page = Number(search.get('page') || 1)7
8  // 用 prisma.$transaction() 进行组合查询9  const [posts, total] = await prisma.$transaction([10    prisma.post.findMany({11      orderBy: {12        created_at: "desc"13      },14      // 分页查询15      take: PAGE_SIZE,16      skip: (page - 1) * PAGE_SIZE17    }),18    prisma.post.count()19  ])20
21  return json({22    posts,23    pageCount: Math.ceil(total / PAGE_SIZE)24  })25}
在页面组件中,我们可以用 Remix 提供的 useSearchParams() 这个 hook 读写 URL search params:
xxxxxxxxxx311// app/routes/_index.tsx2
3export default function Index() {4  const loaderData = useLoaderData<typeof loader>()5  const [searchParams, setSearchParams] = useSearchParams()6  const page = Number(searchParams.get('page') || 1)7
8  return (9    <div>10      <div className="p-12 flex flex-col gap-4">11        {loaderData.posts.map(post => {12          return (13            <div key={post.id}>14              <Link prefetch="intent" to={`/posts/${post.id}`} className="text-xl">15                {post.title}16              </Link>17              <div className="text-sm text-gray-400">18                {post.created_at}19              </div>20            </div>21          )22        })}23        <Pagination page={page} total={loaderData.pageCount} onChange={page => {24          const newSearchParams = new URLSearchParams(searchParams)25          newSearchParams.set('page', String(page))26          setSearchParams(newSearchParams)27        }} />28      </div>29    </div>30  );31}
useSearchParams() 返回一个数组,第一项是读,第二项是写。在分页组件中,我们用 new URLSearchParams() 构造了一个新的 search params, 把 page 这个项设置成了用户点击的页数,然后用 setSearchParams 把这个新的 search params 应用到 URL 上。
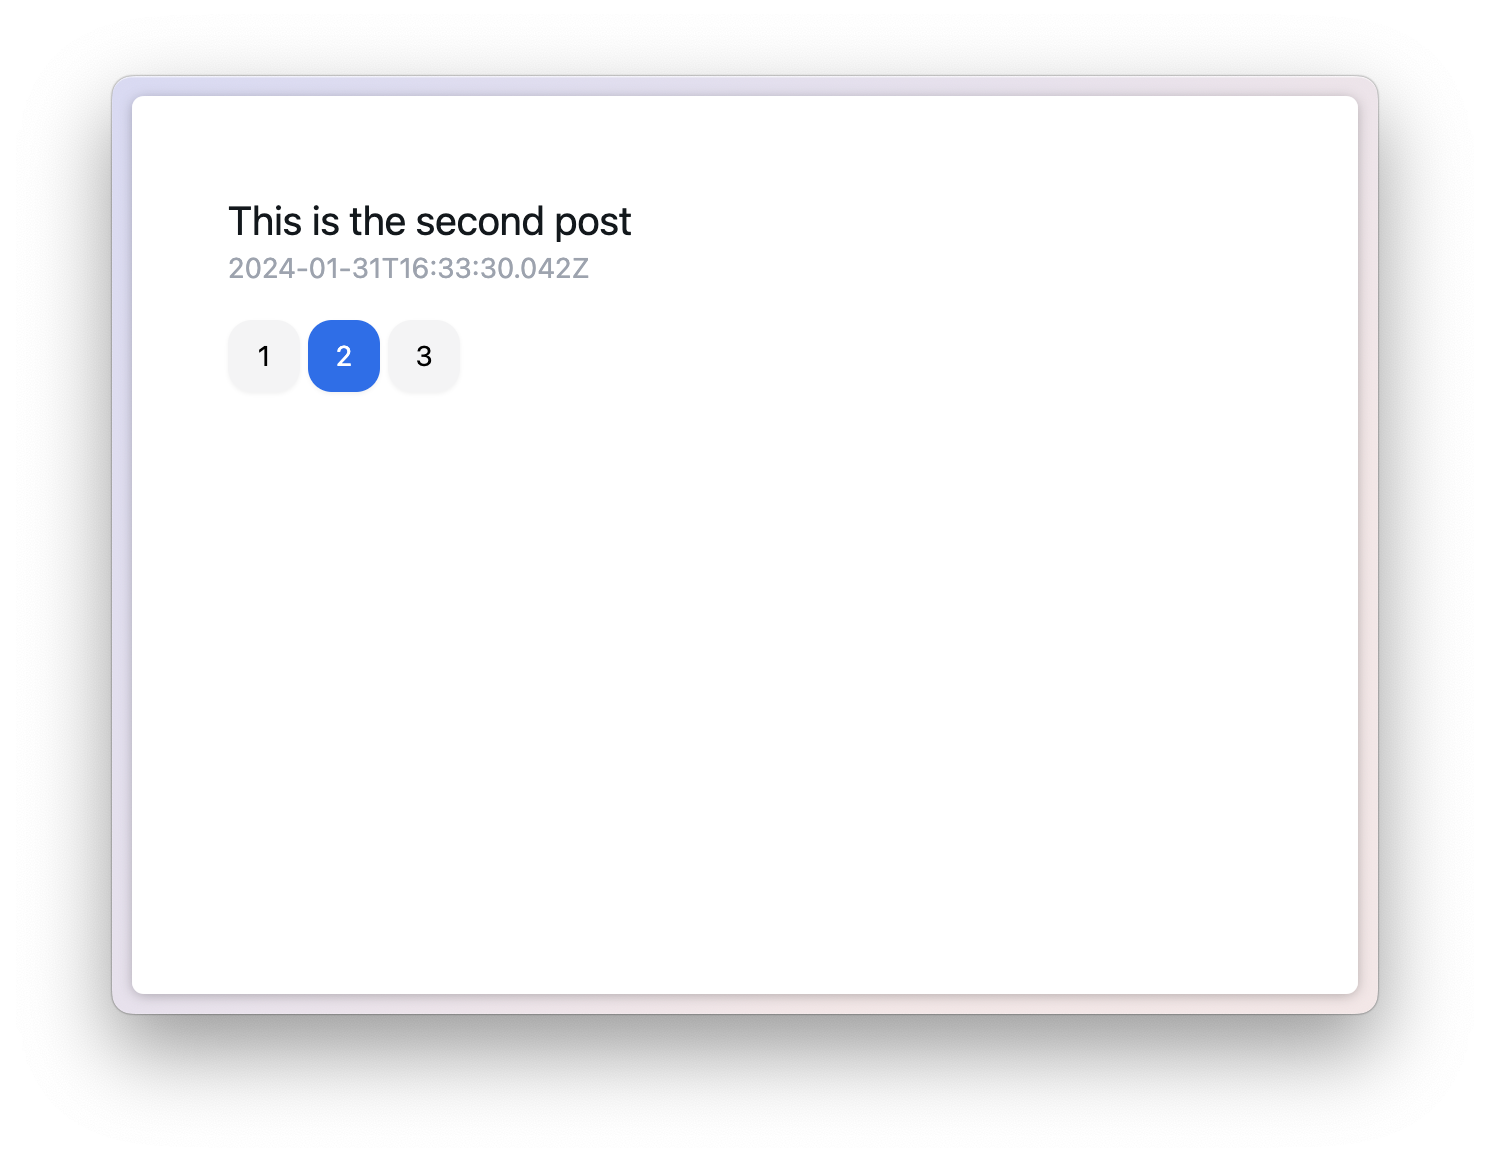
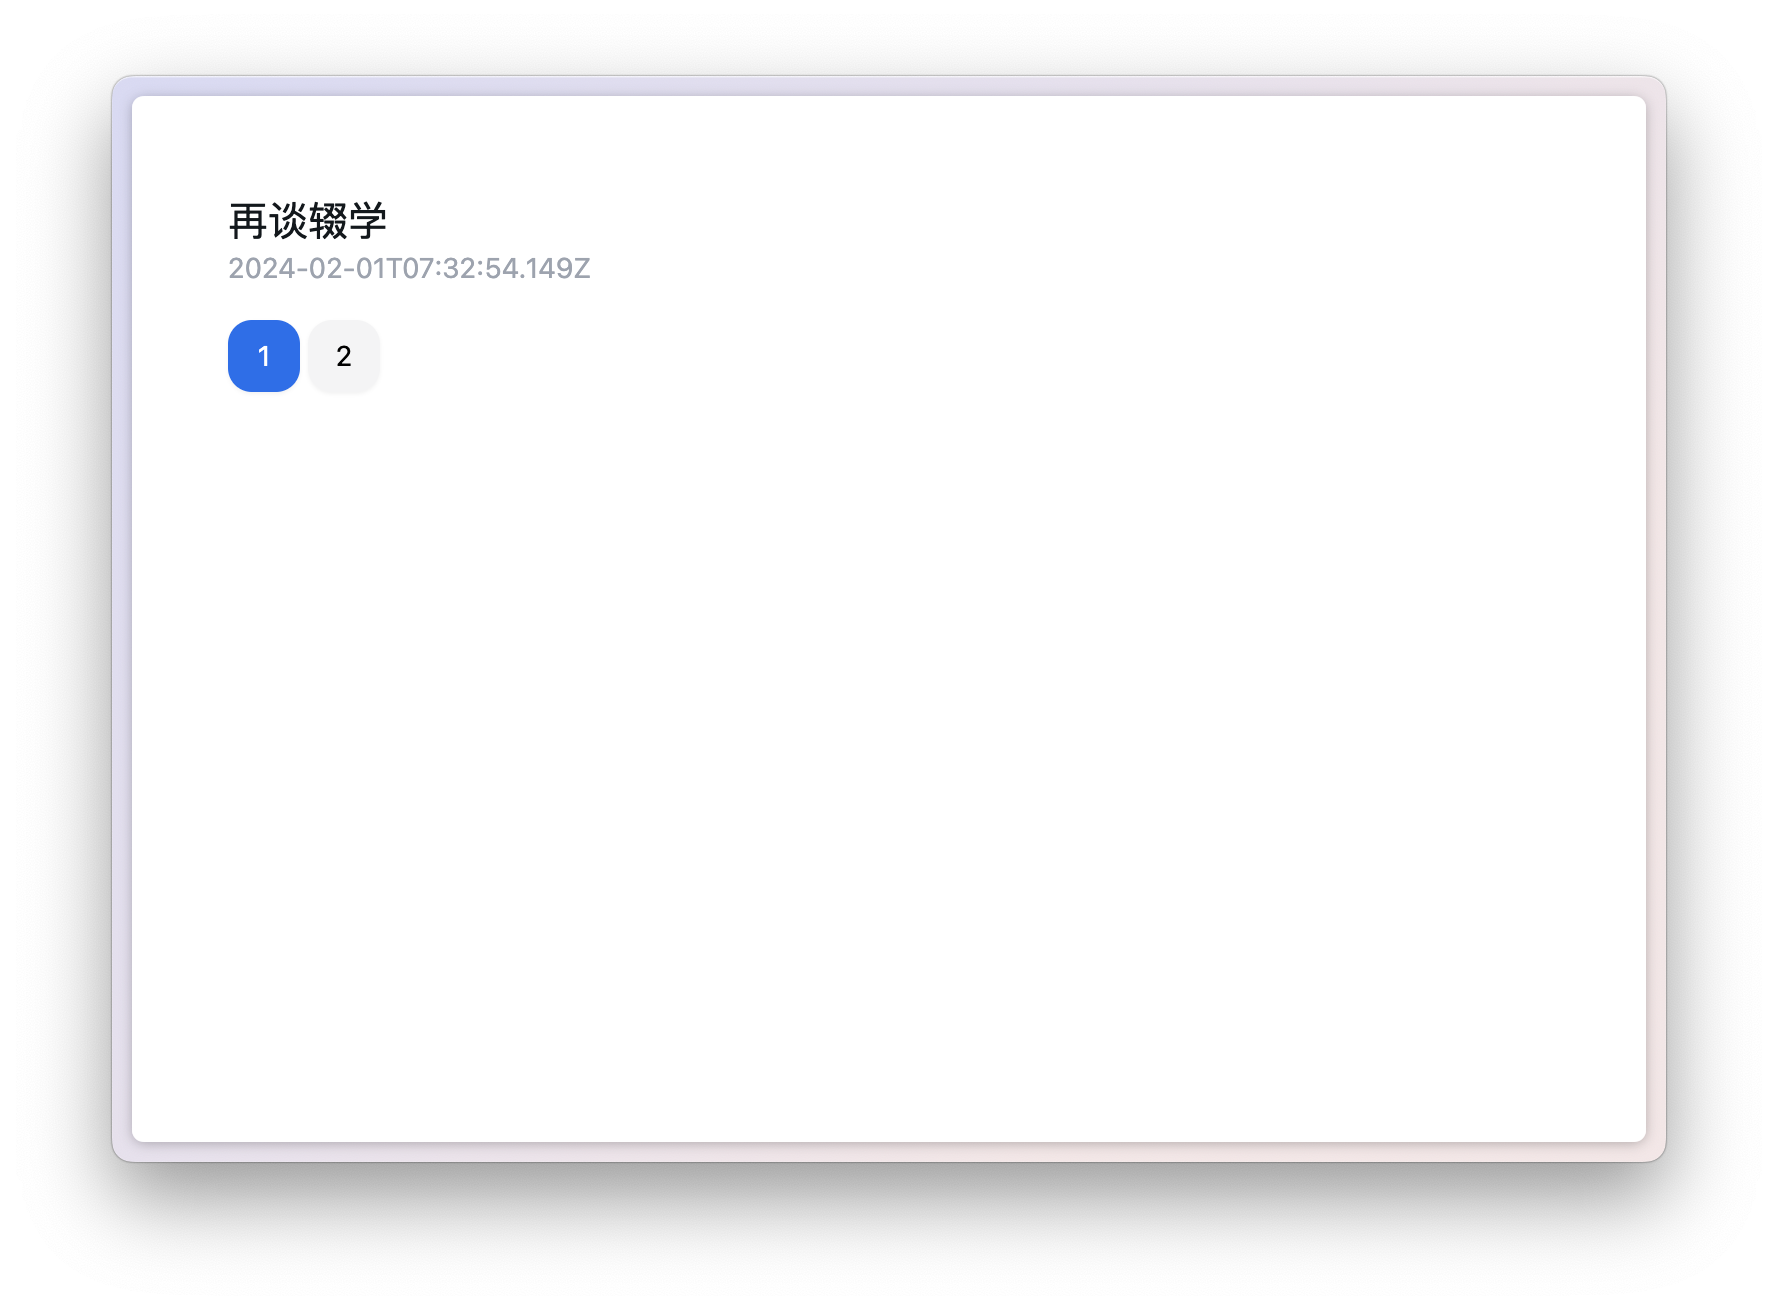
现在,你应该可以看到分页的效果。点击页数,数据会自动重新加载。
到了这里,读者应该能体会到,在 Remix 的应用中,我们其实很少需要手动地做状态管理,而是充分利用 Web 本身提供的特性,比如 Form 表单,比如 URL Search params. 跟网络请求相关的状态,都是 Remix 封装好的。所以在使用 Remix 编写 Web app 时,你会感觉到应用中的 useState 和 useEffect 会大大减少,只有真正涉及前端交互相关的地方才会用到。
第三个页面:文章内容页
现在,内容已经有了,可以开始着手写文章内容页面。我们需要做以下事情:
我们希望用户访问
/posts/:postId时进入文章内容页面,所以我们需要创建路由文件app/routes/posts.$postId.tsx在路由的 loader 中,根据 postId 获取文章内容
在页面中,显示文章内容
首先是 loader:
xxxxxxxxxx211// app/routes/posts.$postId.tsx2
3export const loader = async (c: LoaderFunctionArgs) => {4  const postId = c.params.postId as string;5
6  const post = await prisma.post.findUnique({7    where: {8      id: postId9    }10  })11
12  if (!post) {13    throw new Response("找不到文章", {14      status: 40415    })16  }17
18  return json({19    post20  })21}
我们可以用 c.params 获取路由中的 postId, 然后通过 prisma.findUnique() 根据 ID 查找文章,然后返回 json 结构。
如果文章没有找到,我们直接 throw 一个 Response, 状态码为 404. 在 loader 中,我个人一般会在异常时直接 throw new Response, 除非你需要在页面上定制化地显示错误信息,那么就可以返回一个正常的 json, 然后在前端处理。
然后是内容页面,我们用 @tailwindcss/typography 这个 tailwindcss 插件,可以直接得到一个好看的正文样式。
xxxxxxxxxx11pnpm i @tailwindcss/typography在 tailwind.confgi.js 引入插件:
xxxxxxxxxx171// tailwind.config.js2const { nextui } = require("@nextui-org/react");3
4/** @type {import('tailwindcss').Config} */5module.exports = {6  content: [7    "./app/**/*.tsx",8    "./node_modules/@nextui-org/theme/dist/**/*.{js,ts,jsx,tsx}",9  ],10  theme: {11    extend: {},12  },13  darkMode: "class",14  plugins: [15    nextui(),16+   require("@tailwindcss/typography")],17};
然后,我们用 react-markdown 去渲染正文,这样能够支持 markdown 格式:
xxxxxxxxxx11pnpm i react-markdown现在,编写页面:
xxxxxxxxxx161// app/routes/posts.$postId.tsx2
3import ReactMarkdown from 'react-markdown'4
5export default function Page() {6  const loaderData = useLoaderData<typeof loader>()7
8  return (9    <div className="p-12">10      <div className="prose">11        <h1>{loaderData.post.title}</h1>12        <ReactMarkdown>{loaderData.post.content}</ReactMarkdown>13      </div>14    </div>15  )16}
把正文的 div 加上
prose的类名,就能使用@tailwindcss/typography
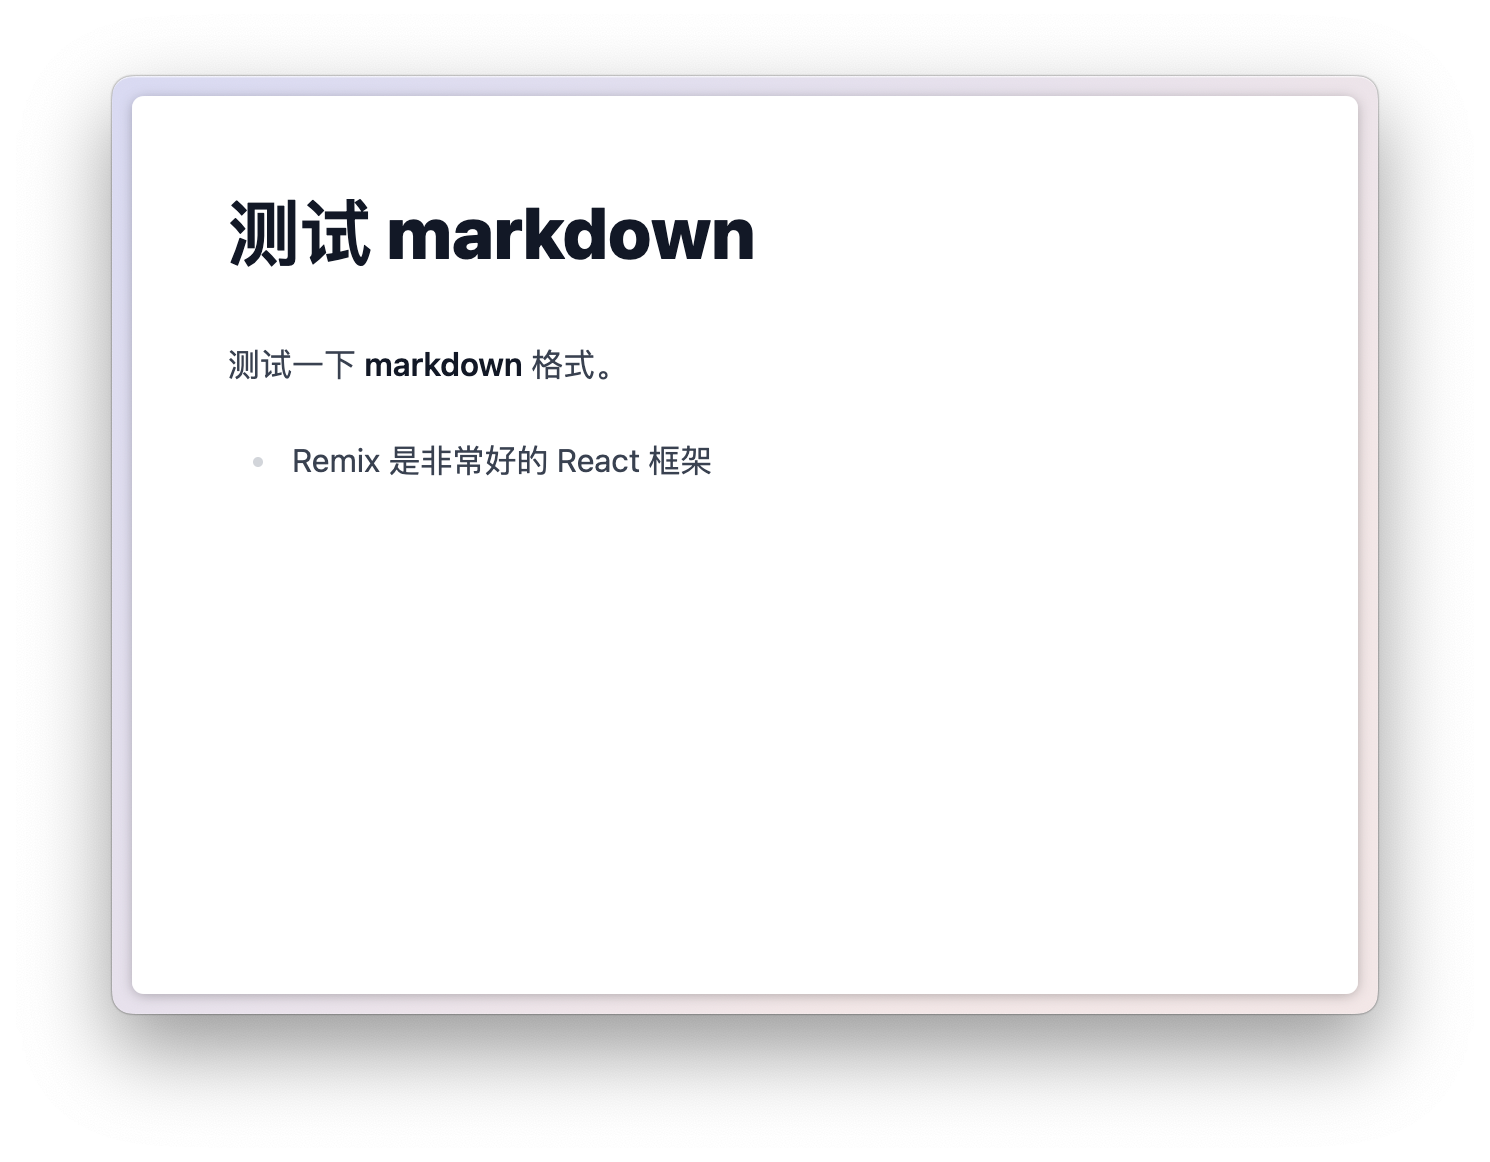
现在已经能看到一个支持 markdown 的文章内容页了。
第四个页面:文章编辑页
接下来,我们要实现编辑文章的功能。我们让用户访问 /posts/:postId/edit 时能进入编辑文章的页面。
在上面的章节中,我们已经学习了使用 loader 和 action 的使用。在编辑页中,会同时使用它们。整个流程大概是:
loader 获取文章内容
action 在数据库中修改文章内容
页面中的表单显示当前文章内容,同时进行编辑和保存
基础编辑
创建 /app/routes/posts.$postId.edit.tsx, 首先写 loader, 和文章内容页无异:
xxxxxxxxxx231// app/routes/posts.$postId.edit.tsx2
3import { LoaderFunctionArgs, json } from "@remix-run/node";4import { prisma } from "~/prisma.server";5
6export const loader = async (c: LoaderFunctionArgs) => {7  const postId = c.params.postId as string;8  const post = await prisma.post.findUnique({9    where: {10      id: postId11    }12  })13
14  if (!post) {15    throw new Response("找不到文章", {16      status: 40417    })18  }19
20  return json({21    post22  })23}
然后是页面:
xxxxxxxxxx181// app/routes/posts.$postId.edit.tsx2
3export default function Page() {4  const loaderData = useLoaderData<typeof loader>()5
6  return (7    <div className="p-12">8      <Form method="POST">9        <div className="flex flex-col gap-3">10          <Input label="slug" name="slug" defaultValue={loaderData.post.id} />11          <Input label="标题" name="title" defaultValue={loaderData.post.title} />12          <Textarea minRows={10} label="正文" name="content" defaultValue={loaderData.post.content} />13          <Button type="submit" color="primary">更新</Button>14        </div>15      </Form>16    </div>17  )18}
可以看到,我们直接通过 HTML 标准的 defaultValue 属性来设置表单的默认值。
然后,我们在上一节写的文章内容页,添加一个编辑的链接:
xxxxxxxxxx171// app/routes/posts.$postId.tsx2
3export default function Page() {4  const loaderData = useLoaderData<typeof loader>()5
6  return (7    <div className="p-12">8+     <div className="mb-3">9+       <Link to="edit" className="underline">编辑</Link>10+     </div>11      <div className="prose">12        <h1>{loaderData.post.title}</h1>13        <ReactMarkdown>{loaderData.post.content}</ReactMarkdown>14      </div>15    </div>16  )17}
这里的
<Link>里的to因为没有以/开头,所以是相对地址。
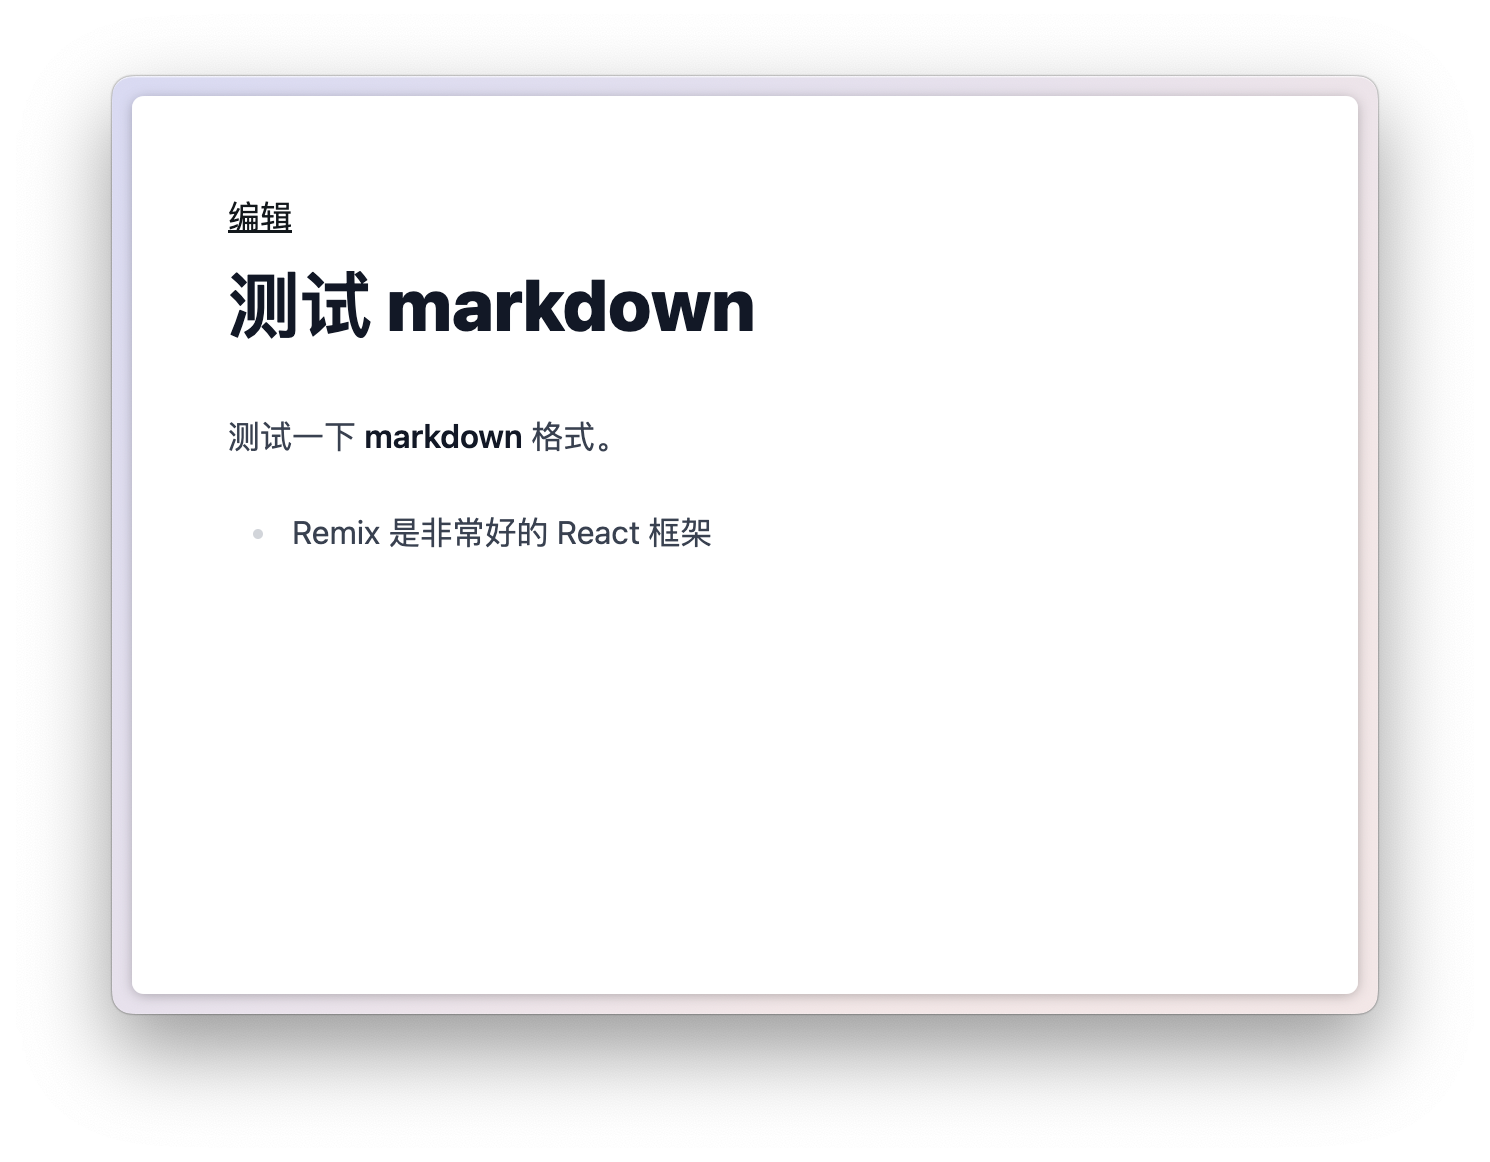
现在,在文章内容页就已经可以看到编辑的入口了。
但是,点击链接,你会发现 URL 已经跳转了,但显示的还是没变,不是我们刚刚写的编辑页面。这是什么原因呢?
这是因为,我们写的 posts.$postId.edit.tsx 把 posts.$postId.tsx 当作是它的父级 layout, 回到我们前面的 Remix 路由设计里所讲的,任何不以 _index 结尾的路由文件,都会是一个 layout.
所以我们要把 posts.$postId.tsx 改成 posts.$postId._index.tsx.
xxxxxxxxxx41* app2 * routes3- * posts.$postId.tsx4+ * posts.$postId._index.tsx这时再进入编辑页,就能看到我们写的编辑表单了:
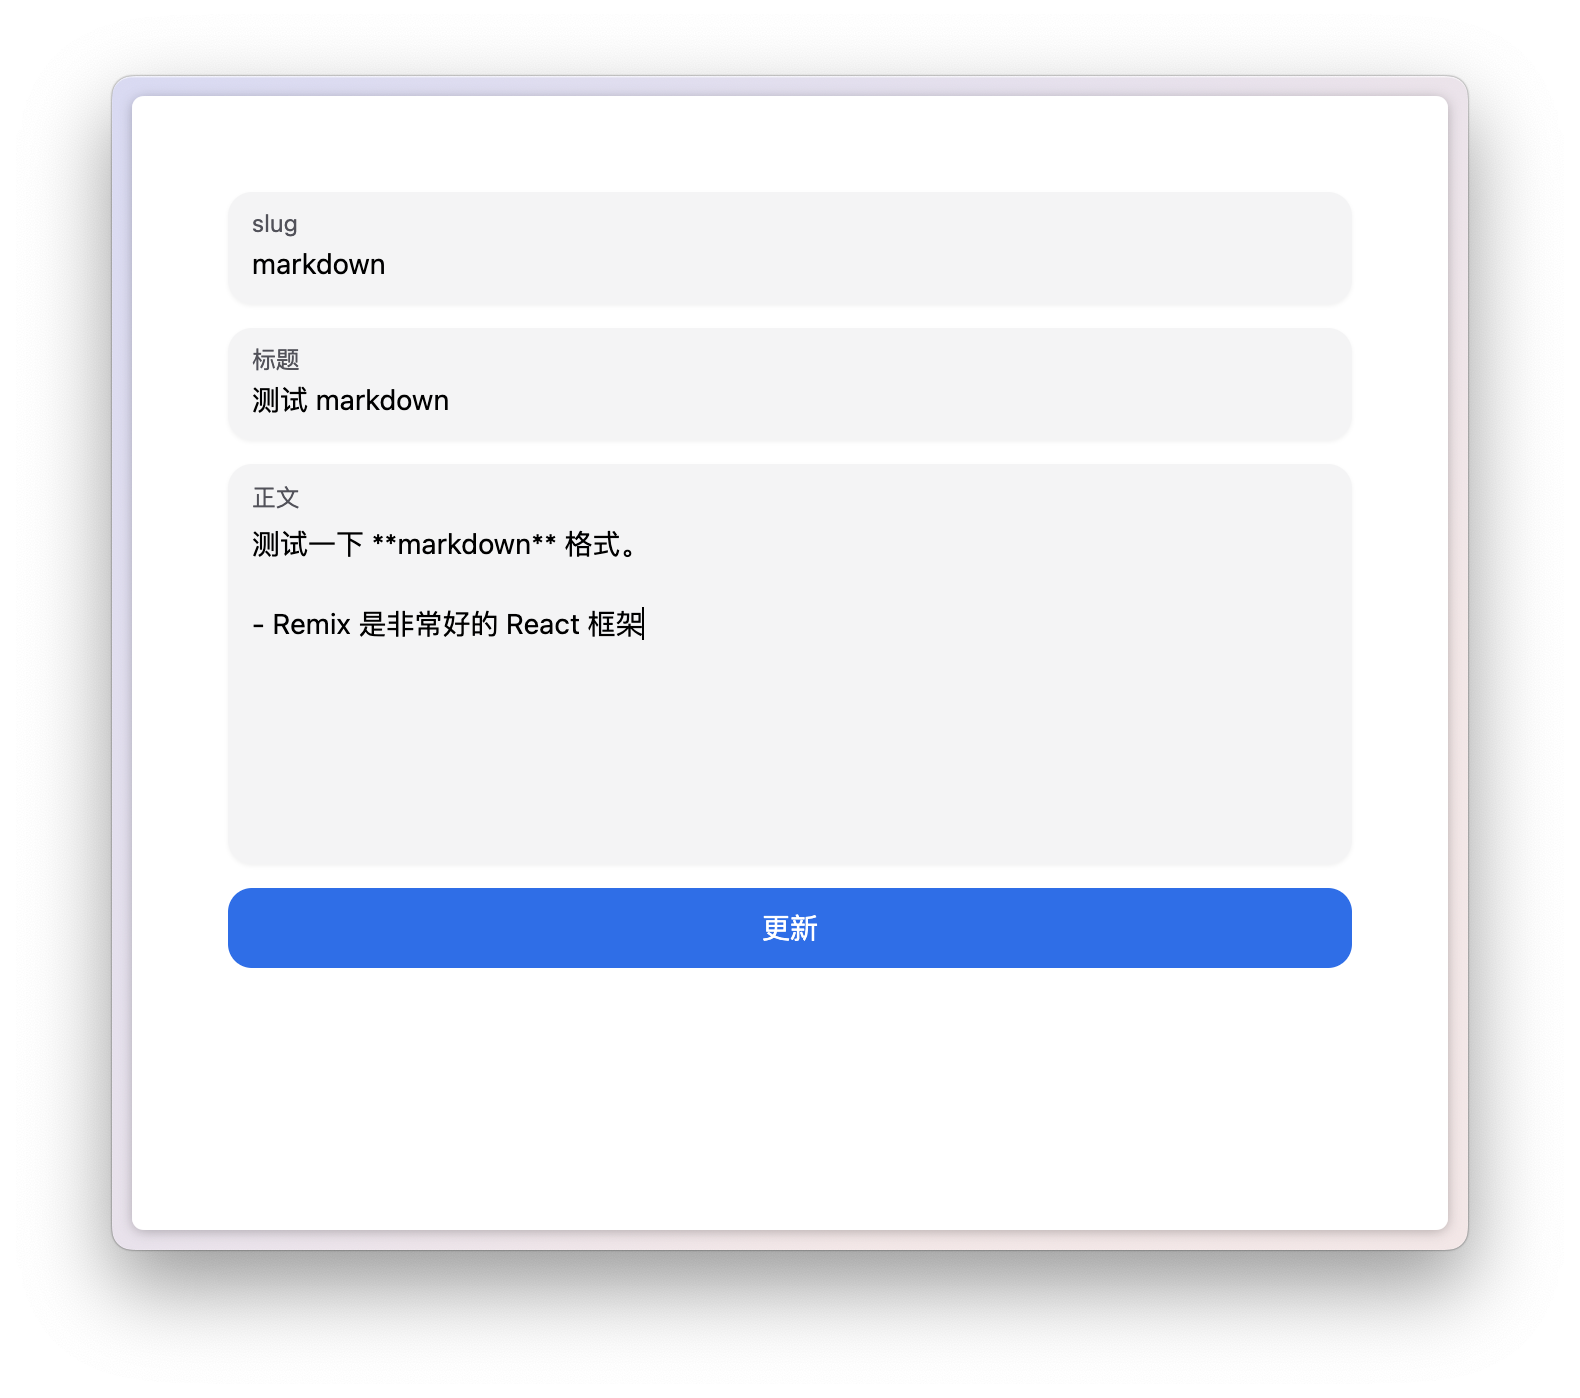
现在来定 action, 和发布文章类似,获取 formData 的表单内容,用 prisma 更新数据表:
xxxxxxxxxx231// app/routes/posts.$postId.edit.tsx2
3export const action = async (c: ActionFunctionArgs) => {4  const postId = c.params.postId as string;5  const formData = await c.request.formData()6
7  const title = formData.get('title') as string8  const content = formData.get('content') as string9  const slug = formData.get('slug') as string10
11  await prisma.post.update({12    where: {13      id: postId14    },15    data: {16      id: slug,17      title,18      content19    }20  })21
22  return redirect(`/posts/${slug}`)23}
现在试一试修改,在成功修改文章后,会自动跳转回文章内容页。
这里为了节约篇幅,不再做数据校验
为了在更新文章按钮显示加载的状态,我们和上一节一样,使用 useNavigation 获取表单提交状态:
xxxxxxxxxx191// app/routes/posts.$postId.edit.tsx2
3export default function Page() {4  const loaderData = useLoaderData<typeof loader>()5+ const navigation = useNavigation()6
7  return (8    <div className="p-12">9      <Form method="POST">10        <div className="flex flex-col gap-3">11          <Input label="slug" name="slug" defaultValue={loaderData.post.id} />12          <Input label="标题" name="title" defaultValue={loaderData.post.title} />13          <Textarea minRows={10} label="正文" name="content" defaultValue={loaderData.post.content} />14+         <Button isLoading={navigation.state === 'submitting'} type="submit" color="primary">更新</Button>15        </div>16      </Form>17    </div>18  )19}
删除文章
同样在这个页面,我们将支持删除文章。有两种不同的方法可以实现。
方法一
我们在更新按钮下方加上删除按钮。另外,在两个按钮分别设置它们的 name 和value 属性,用于区分它们的不同行为:
xxxxxxxxxx21 <Button name="action" value="edit" isLoading={navigation.state === 'submitting'} type="submit" color="primary">更新</Button>2<Button name="action" value="delete" type="submit" color="danger">删除</Button>这样在触发 loader 的时候,就可以通过判断 formData 中的 action 值,来区分不同的操作:
xxxxxxxxxx351// app/routes/posts.$postId.edit.tsx2
3export const action = async (c: ActionFunctionArgs) => {4  const postId = c.params.postId as string;5  const formData = await c.request.formData()6
7  const title = formData.get('title') as string8  const content = formData.get('content') as string9  const slug = formData.get('slug') as string10
11  const action = formData.get('action') as 'edit' | 'delete'12
13  if (action === 'delete') {14    await prisma.post.delete({15      where: {16        id: postId17      }18    })19
20    return redirect("/")21  } else {22    await prisma.post.update({23      where: {24        id: postId25      },26      data: {27        id: slug,28        title,29        content30      }31    })32
33    return redirect(`/posts/${slug}`)34  }35}
然后,加载状态也要通过 formData 中的 action 值来区分, useNavigation 是能得到 formData 的:
xxxxxxxxxx211export default function Page() {2  const loaderData = useLoaderData<typeof loader>()3  const navigation = useNavigation()4
5+ const isDeleting = navigation.state === 'submitting' && navigation.formData?.get("action") === 'delete'6+ const isEditing = navigation.state === 'submitting' && navigation.formData?.get("action") === 'edit'7
8  return (9    <div className="p-12">10      <Form method="POST">11        <div className="flex flex-col gap-3">12          <Input label="slug" name="slug" defaultValue={loaderData.post.id} />13          <Input label="标题" name="title" defaultValue={loaderData.post.title} />14          <Textarea minRows={10} label="正文" name="content" defaultValue={loaderData.post.content} />15+         <Button name="action" value="edit" isLoading={isEditing} type="submit" color="primary">更新</Button>16+         <Button name="action" value="delete" isLoading={isDeleting} type="submit" color="danger">删除</Button>17        </div>18      </Form>19    </div>20  )21}
方法二
第二种方法,我们可以把删除文章放在一个独立的路由的 action 里,我们新建一个 app/routes/posts.$postId.delete.tsx, 在这个路由,我们只需要写一个 action 即可:
xxxxxxxxxx161// app/routes/posts.$postId.delete.tsx2
3import { ActionFunctionArgs, redirect } from "@remix-run/node";4import { prisma } from "~/prisma.server";5
6export const action = async (c: ActionFunctionArgs) => {7  const postId = c.params.postId as string;8
9  await prisma.post.delete({10    where: {11      id: postId12    }13  })14
15  return redirect("/")16}
接下来,我们就要用到 Remix 提供的 useFetcher() hook. 这个 hook 的作用是可以获取单独的一个表单提交数据。我们把删除按钮单独包在一个 Form 里,而这个 Form 则是 useFetcher() 返回的 Form:
xxxxxxxxxx271export default function Page() {2  const loaderData = useLoaderData<typeof loader>()3  const navigation = useNavigation()4
5  const deleteFetcher = useFetcher()6
7  const isDeleting = deleteFetcher.state === 'submitting'8  const isEditing = navigation.state === 'submitting' && navigation.formData?.get("action") === 'edit'9
10  return (11    <div className="p-12">12      <Form method="POST">13        <div className="flex flex-col gap-3">14          <Input label="slug" name="slug" defaultValue={loaderData.post.id} />15          <Input label="标题" name="title" defaultValue={loaderData.post.title} />16          <Textarea minRows={10} label="正文" name="content" defaultValue={loaderData.post.content} />17          <Button isLoading={isEditing} type="submit" color="primary">更新</Button>18        </div>19      </Form>20      <div>21        <deleteFetcher.Form method="POST" action={`/posts/${loaderData.post.id}/delete`}>22          <Button name="action" value="delete" isLoading={isDeleting} type="submit" color="danger">删除</Button>23        </deleteFetcher.Form>24      </div>25    </div>26  )27}
我们用 useFetcher() 为删除文章创建了一个 fetcher, 把删除按钮包在了 deleteFetcher.Form 里,action 设置为我们刚刚写的路由 URL. 而这个路由的请求状态,我们可以使用 deleteFetcher.state 进行判断。
附加题:在用户确认后删除文章
现在思考一个问题,如果我想在用户点击删除按钮后,先 window.prompt 一个确认框,确认后才删除,应该怎么做?
这样的场景,就不能像普通的 Form 一样直接提交表单,而是需要我们手动地触发表单提交。
对于使用 useFetcher() 的方法(方法二),我们可以用 .submit() 手动提交表单:
xxxxxxxxxx81<Button name="action" value="delete" isLoading={isDeleting} onClick={_ => {2 if (confirm("确定删除吗?")) {3 deleteFetcher.submit(null, {4 method: "POST",5 action: `/posts/${loaderData.post.id}/delete`6 })7 }8}} color="danger">删除</Button>对于方法一,我们可以使用 useSubmit() hook:
xxxxxxxxxx141const submit = useSubmit()2
3return (4  <Button name="action" value="delete" isLoading={isDeleting} onClick={_ => {5    if (confirm("确定删除吗?")) {6      const formData = new FormData()7      formData.set("action", "delete")8      submit(formData, {9        method: "POST",10        action: `/posts/${loaderData.post.id}/delete`11      })12    }13  }} color="danger">删除</Button>14)
用户系统
目前为止,基本的对文章的增删改查已经完成。在这一章节,我们实现一个最简单的用户系统。实现用户注册和登录,只允许登录用户编辑修改文章。
用户登录的实现逻辑
实现用户登录的一种方法是使用 cookies 保存用户信息(比如 user id)。这个信息在服务端用密钥加密(一般是 JWT),用户请求接口时拿到这个 cookies 然后解密验证。
对于这种鉴权方法是不是最安全的,业界一直争议不断。本书不作讨论。
也就是说,实现用户登录,需要做以下几步:
JWT 加密解密
在 action 和 loader 中鉴定 JWT token
在登入登出时设置 Cookies
在 Remix 中,我们可以用 cookieSessionStorage 很方便地进行 cookies 读写以及加解密,我们不需要手动地做 JWT 加解密。
添加用户数据表
在 prisma/schema.prisma 中,添加用户的数据模型:
xxxxxxxxxx41model User {2 username String @id3 password String4}我们使用用户名密码的方式保存用户。
把模型应用到数据库中:
xxxxxxxxxx31pnpm exec prisma db push2# 或 npm3npx prisma db push注册页面
首先编写注册页面,添加一个路由 app/routes/signup.tsx:
xxxxxxxxxx181// app/routes/signup.tsx2
3import { Button, Input } from "@nextui-org/react";4import { Form } from "@remix-run/react";5
6export default function Page() {7  return (8    <Form method="POST">9      <div className="p-12 flex flex-col gap-3">10        <Input label="用户名" name="username" />11        <Input type="password" label="密码" name="password" />12        <Button type="submit" color="primary">13          注册14        </Button>15      </div>16    </Form>17  )18}
进入 http://localhost:3000/signup 即可看到注册页面:
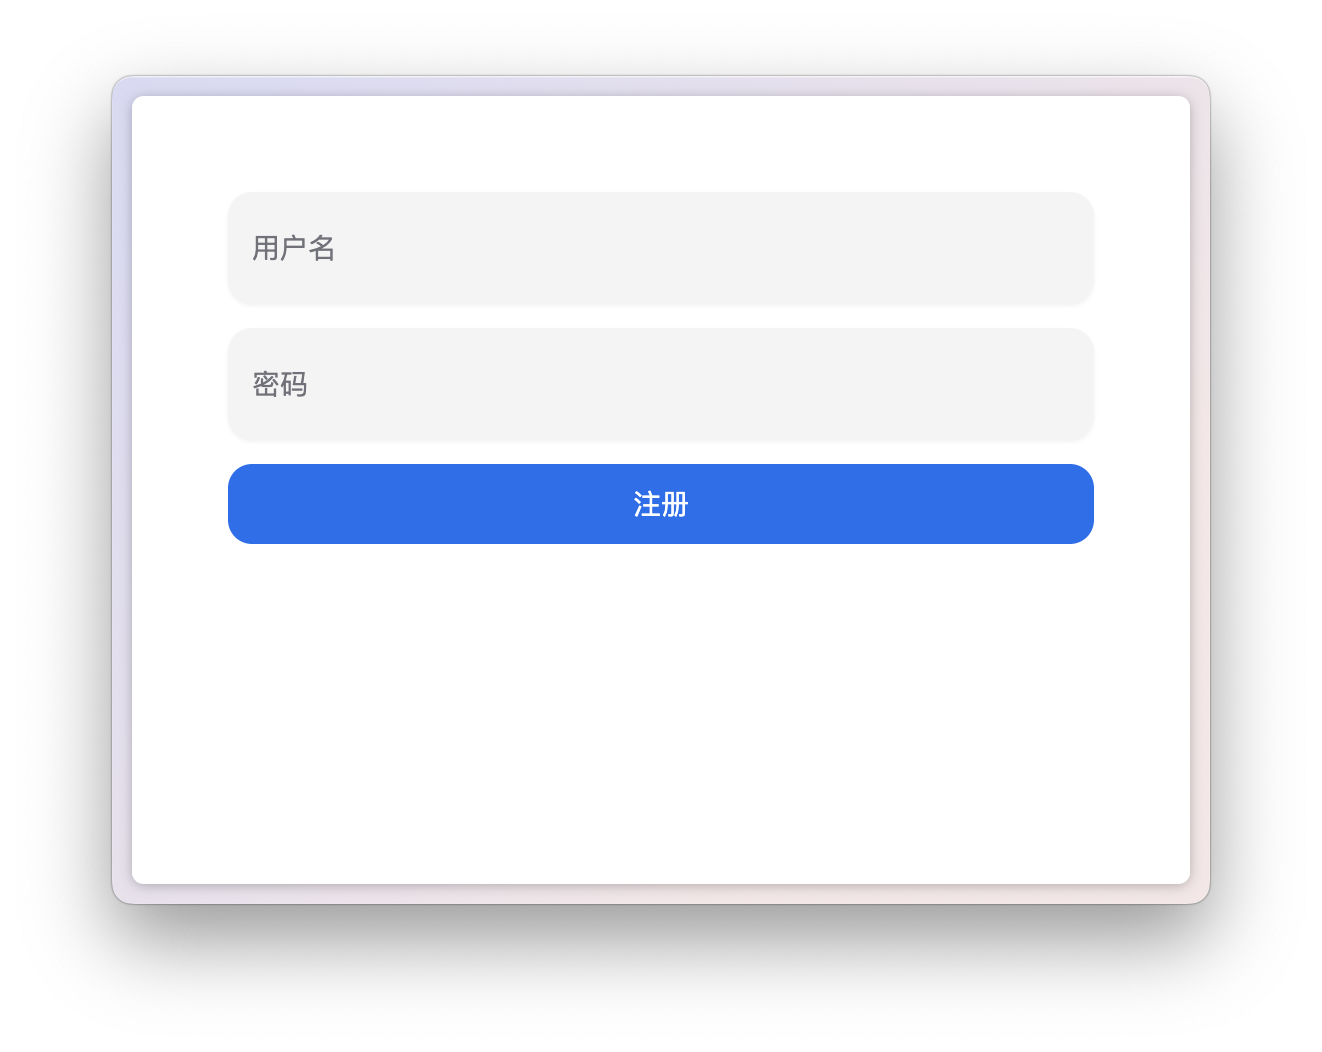
然后在 action 里在 User 表插入新用户数据:
xxxxxxxxxx171// app/routes/signup.tsx2
3export const action = async (c: ActionFunctionArgs) => {4  const formData = await c.request.formData();5
6  const username = formData.get("username") as string;7  const password = formData.get("password") as string;8
9  await prisma.user.create({10    data: {11      username: username,12      password: password,13    }14  })15
16  return redirect("/signin")17}
请注意,你不应该明文保存你的用户密码,应该使用
bcrypt对密码进行加密保存。本书为节省篇幅,直接使用明文。
现在,创建一个用户,成功后会返回 /signin 登录页面,也就是接下来我们要写的页面。
登录页面
创建 app/routes/signin.tsx:
xxxxxxxxxx151// app/routes/signin.tsx2
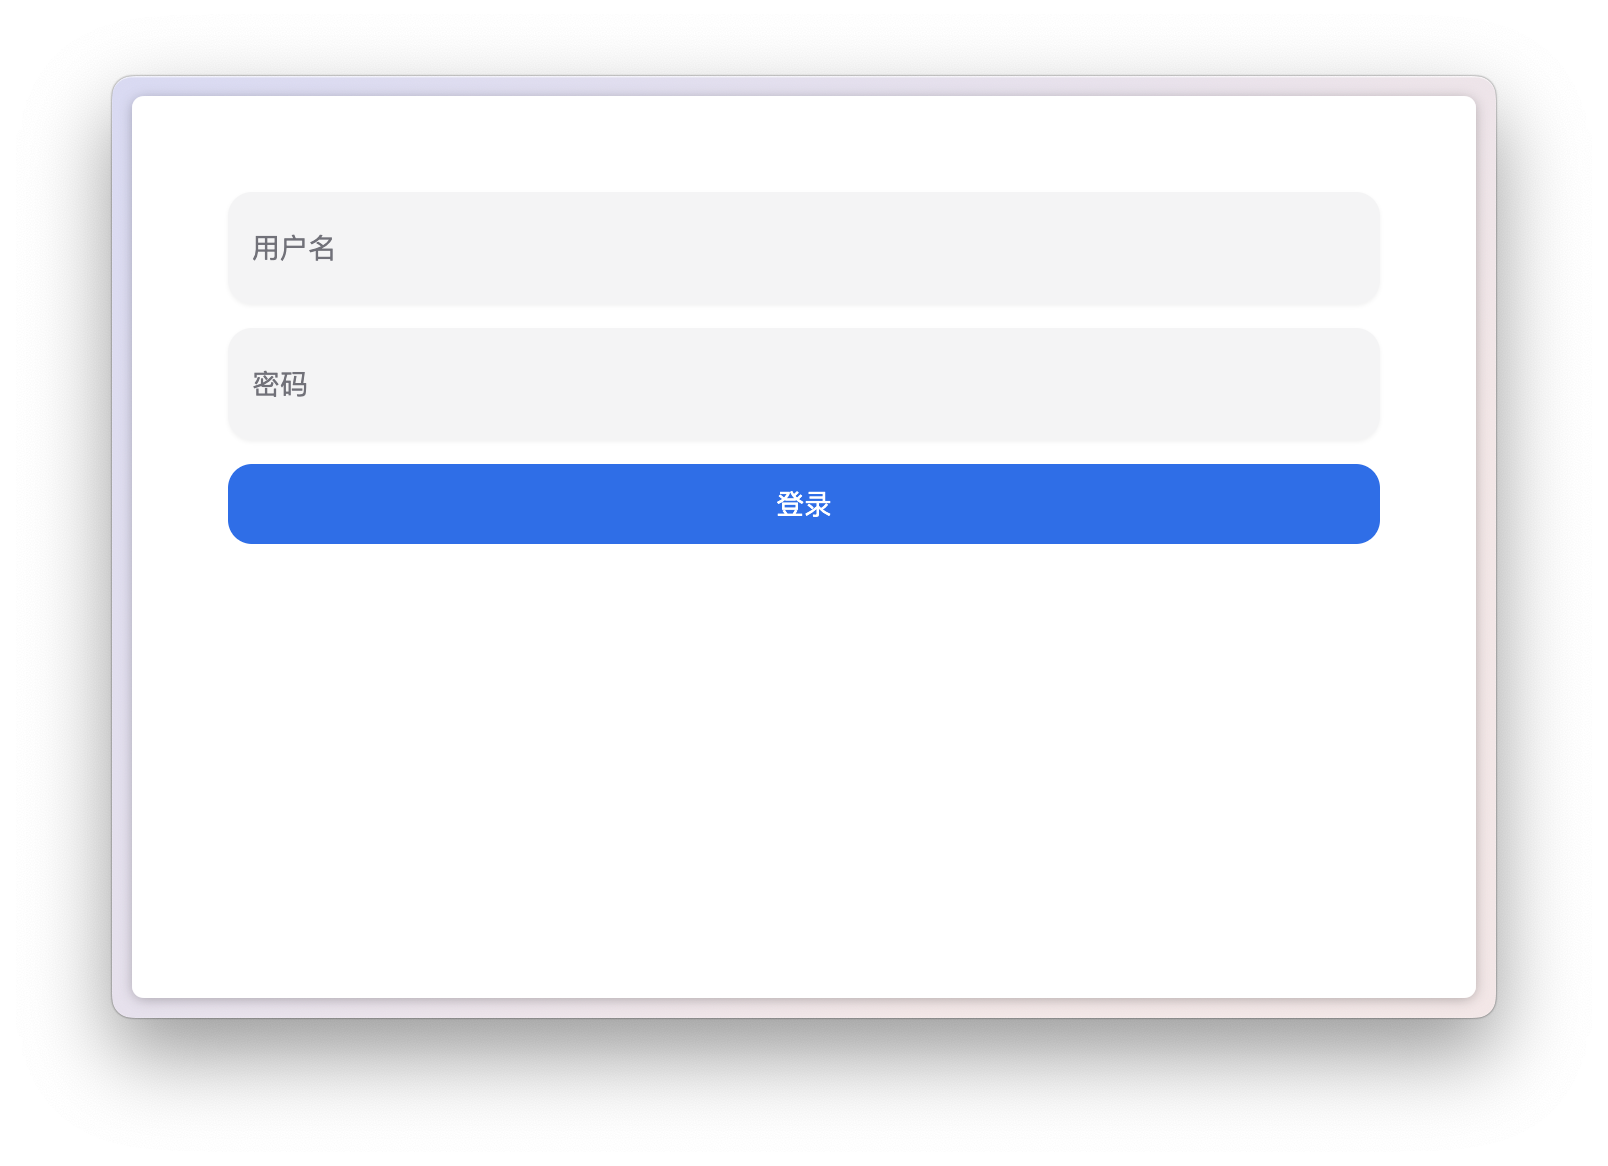
3export default function Page() {4  return (5    <Form method="POST">6      <div className="p-12 flex flex-col gap-3">7        <Input label="用户名" name="username" />8        <Input type="password" label="密码" name="password" />9        <Button type="submit" color="primary">10          登录11        </Button>12      </div>13    </Form>14  )15}
使用 Remix cookieSessionStorage
在登录的 action 里,首先我们判断用户名密码是否正确,如果不正确,则返回错误信息给页面展示:
xxxxxxxxxx231// app/routes/signin.tsx2
3export const action = async (c: ActionFunctionArgs) => {4  const formData = await c.request.formData();5
6  const username = formData.get("username") as string;7  const password = formData.get("password") as string;8
9  const user = await prisma.user.findUnique({10    where: {11      username: username,12    }13  })14
15  if (!user || user.password !== password) {16    return json({17      success: false,18      errors: {19        username: "用户名密码不正确"20      }21    })22  }23}
如果校验成功,我们就可以用 Remix 提供的 createCookieSessionStorage 生成加密的信息,存储到 cookies 中。
首先,创建一个 app/session.session.ts:
xxxxxxxxxx221// app/session.server.ts2import { createCookieSessionStorage } from "@remix-run/node";3
4export type UserSessionData = {5  username: string6}7
8export const userSessionStorage =9  createCookieSessionStorage<UserSessionData>(10    {11      cookie: {12        name: "__session",13        httpOnly: true,14        maxAge: 60 * 60 * 24, // 过期时间,这里为一天15        path: "/",16        sameSite: "lax",17        // 加密密钥18        secrets: [process.env.SESSION_SECRET as string],19        secure: true,20      },21    }22  );
在上面的代码中,我们创建了一个 userSessionStorage, 用于我们在登录时读写加密的 cookies 数据。
注意,secrets 我们没有直接写死在这里,而是使用环境变量,所以你需要在 .env 文件里加入 SESSION_SECRET 这个变量值:
xxxxxxxxxx21# .env2SESSION_SECRET=of_course_i_still_love_y0u回到登录页面代码,在校验成功后,就可以使用 userSessionStorage 了:
xxxxxxxxxx191// app/routes/signin.tsx2
3if (!user || user.password !== password) {4  return json({5    success: false,6    errors: {7      username: "用户名密码不正确"8    }9  })10}11
12const session = await userSessionStorage.getSession(c.request.headers.get('Cookie'))  13session.set("username", username) 14
15return redirect("/", {16  headers: {17    'Set-Cookie': await userSessionStorage.commitSession(session)18  }19})
首先我们用 .getSession() 从 Cookies 中读取数据,然后使用 .set() 设置 username 的值。最后跳转到首页,并设置 cookies.
整个流程中,Remix 已经帮你做好了加解密和 Cookies 拼接的工作。如果你在开发者工具查看 Cookies, 你应该能看到加密过的 token:
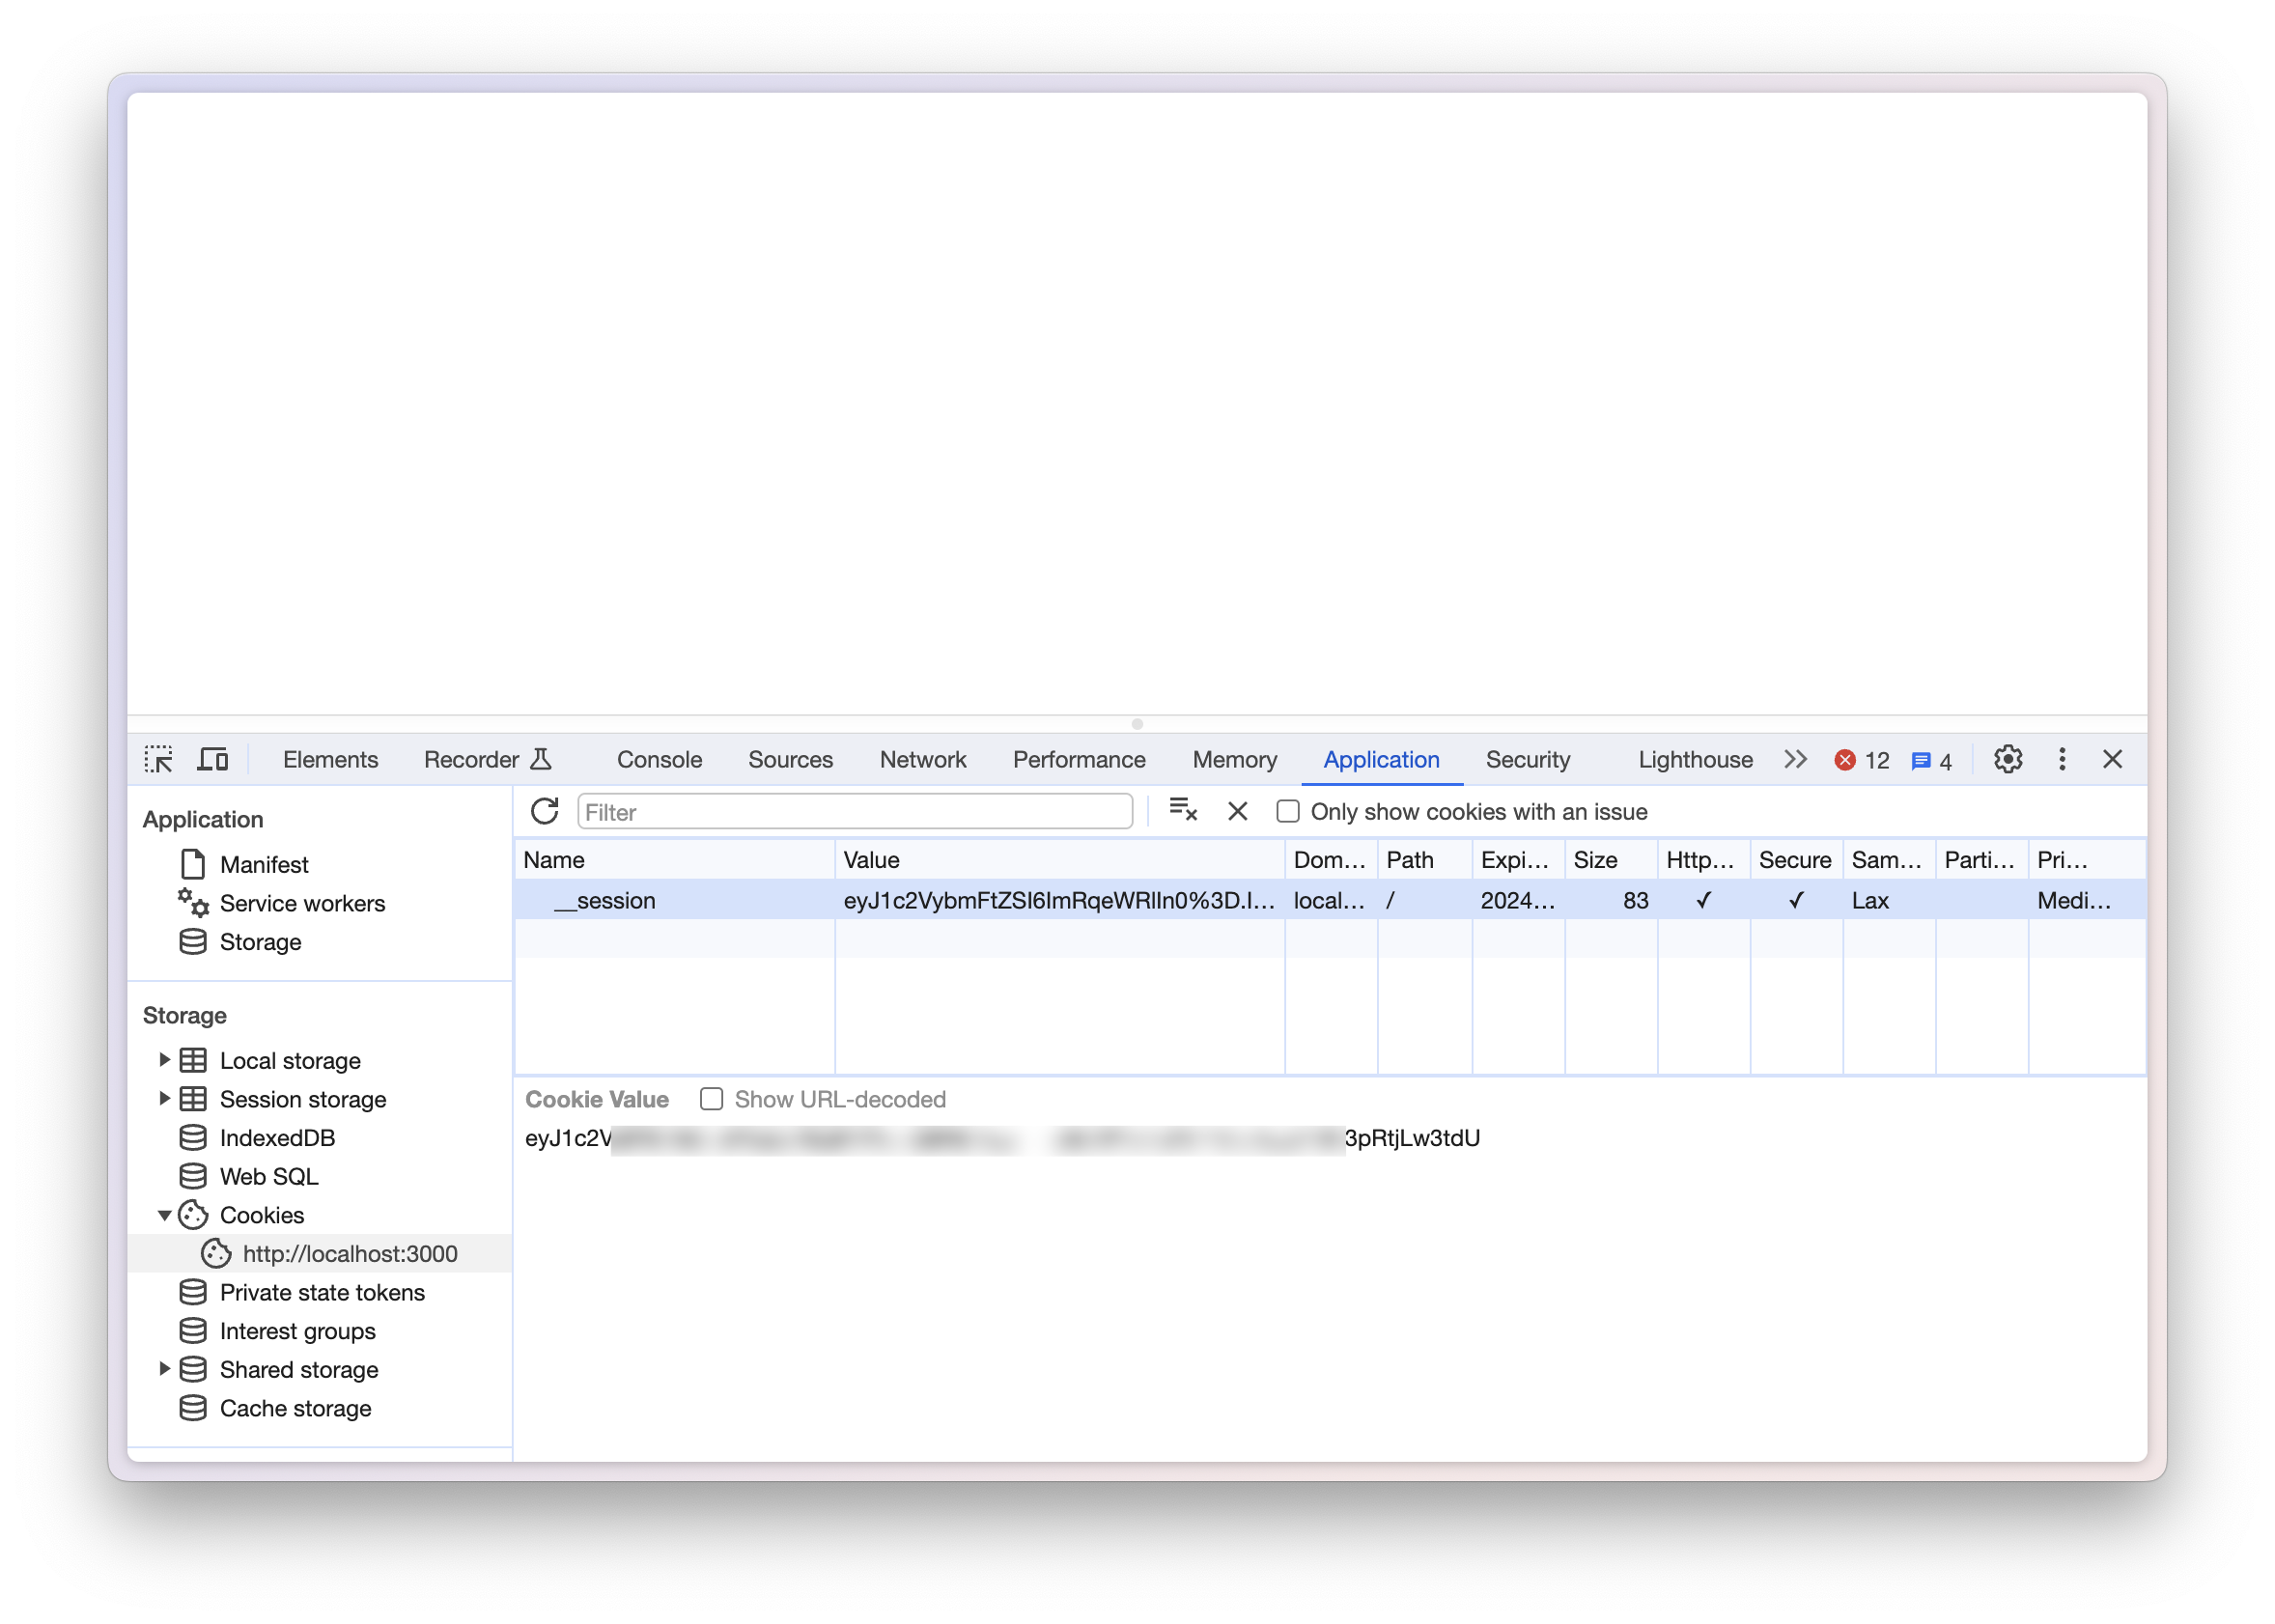
保护路由 (protect route)
现在我们已经登录,我们如果保证用户进入之前是登录状态呢?我们同样可以使用我们创建的 userSessionStorage, 在页面的 loader 获取用户登录信息,如果用户未登录,则跳转到登录页面。
我习惯在 app/session.server.ts 写一个通用方法来从 cookies 读取用户信息:
xxxxxxxxxx81// app/session.server.ts2
3export const auth = async (request: Request) => {4  const session = await userSessionStorage.getSession(request.headers.get("Cookie"));5  return {6    username: session.get("username"),7  } as UserSessionData8}
这样我们可以在文章编辑页面直接使用它来判断用户是否登录:
xxxxxxxxxx261// app/routes/posts.$postId.edit.tsx2
3export const loader = async (c: LoaderFunctionArgs) => {4+ const user = await auth(c.request)5+ if (!user.username) {6+   return redirect("/signin")7+ }8
9  const postId = c.params.postId as string;10  const post = await prisma.post.findUnique({11    where: {12      id: postId13    }14  })15
16  if (!post) {17    throw new Response("找不到文章", {18      status: 40419    })20  }21
22  return json({23    post24  })25}26
这时,如果你没有登录,访问文章编辑页面,会自动跳转到登录页。
附录
接入 Lemon Squeezy
对于有打算做付费 SaaS 服务的读者,会考虑接入现有的支付平台。我自己习惯用 Lemon Squeezy, 它的接入也很方便。这一章我将演示如何在 Remix 应用中接入支付功能(非 subscription 类型支持)。
整体流程大概是:
在 Lemon Squeezy 中创建商品,得到 product id
在 Remix 中创建一个接收 Lemon Squeezy webhook POST 的接口,当有新订单时,校验签名,确定请求来自 Lemon 后,校验 product id, 最后在数据库中写入相关数据
在 Lemon Squeezy 设置 webhook 地址
本文不涉及如何在 Lemon Squeezy 创建商品的内容,接下来的内容,默认你已经有了商品。
编写 webhook
假设我们希望 webhook 的地址为 /api/lemon, 我们可以创建路由文件 app/routes/api/lemon. 在 Remix 的 route module 中,任何进来的请求,GET 请求会打到 loader, 其它请求会打到 action. 因此我们要写一个 action, 来承接 lemon 的数据:
xxxxxxxxxx111// app/routes/api/lemon2
3import { ActionFunctionArgs, json } from "@remix-run/node";4
5export const action = async (c: ActionFunctionArgs) => {6  if (c.request.method === 'POST') {7    // 接收 lemon 传来的数据8  }9
10  return json({})11}
商品的 product id 可以在 lemon 的后台获得:
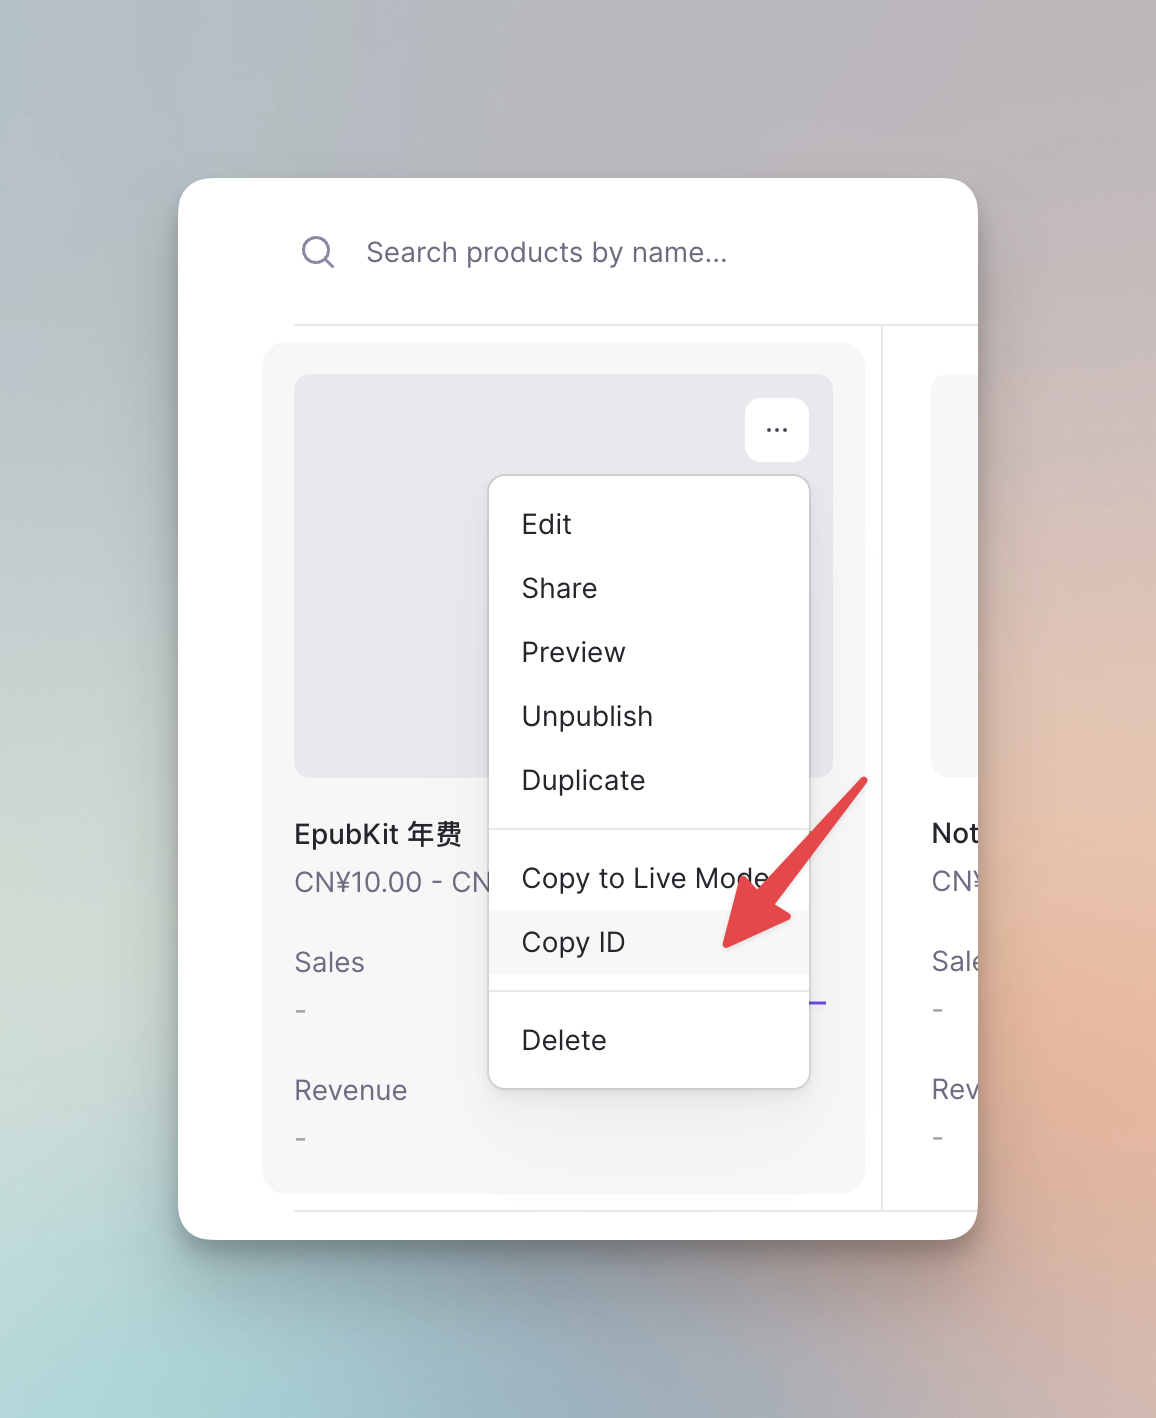
然后我们把这个 ID 放在环境变量中:
xxxxxxxxxx21# .env2LEMON_PRODUCT_ID=177051然后在 Lemon 创建一个 Webhook:
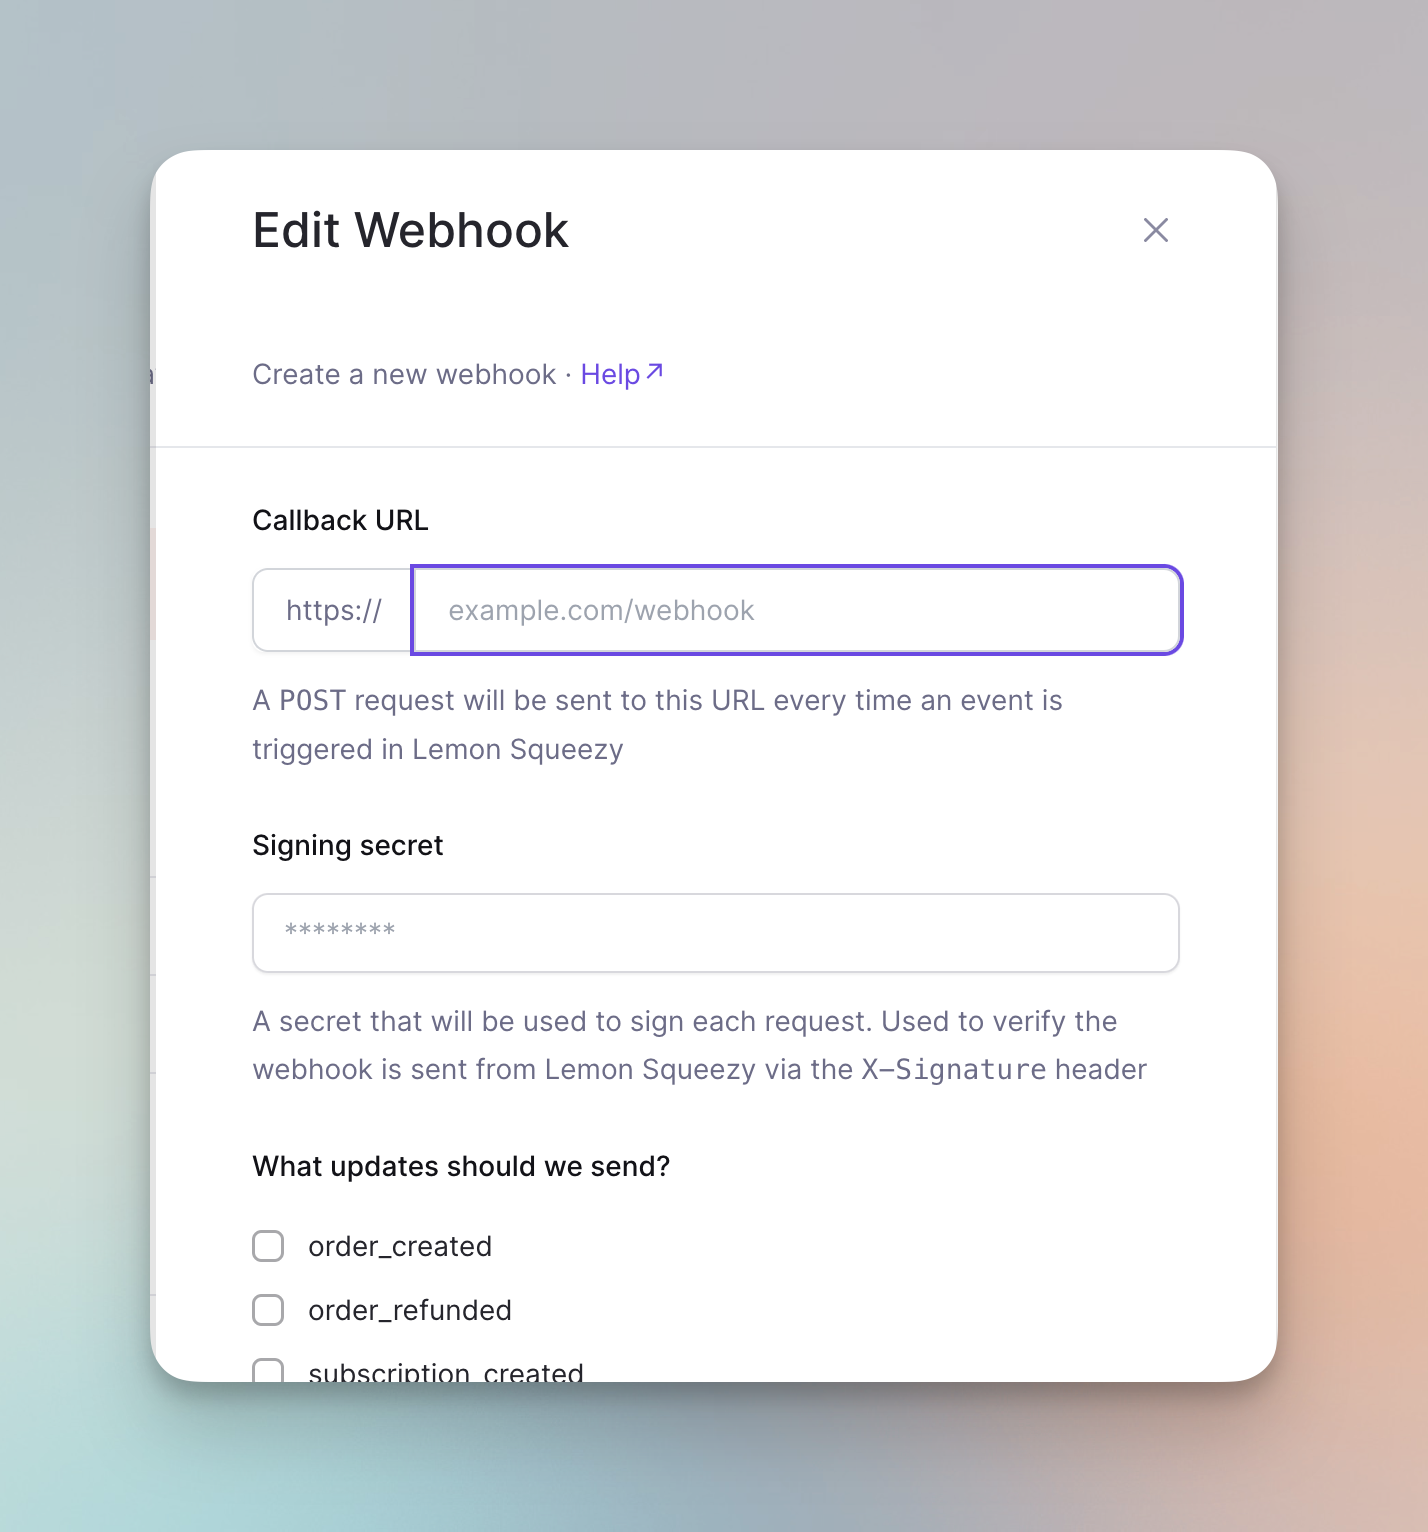
callback URL 我们可以使用 ngrok 这样的工具代理我们的 3000 端口拿到一个公网地址:
xxxxxxxxxx11ngrok http 3000signing secret 自己写一个,然后也要保存在环境变量中:
xxxxxxxxxx21# .env2LEMON_SECRET=of_course_i_still_love_you下面接收的 updates 我们勾选 order_created, 这样有订单时就会打到我们的 webhook.
现在,我们在 webhook action 里处理 lemon 发来的请求,首先,用官方提供的解密算法校验请求:
xxxxxxxxxx251import { ActionFunctionArgs, json } from "@remix-run/node";2import crypto from 'crypto'3
4export const action = async (c: ActionFunctionArgs) => {5  if (c.request.method === 'POST') {6
7    const headers = c.request.headers8    const secret = process.env.LEMON_SECRET as string;9
10    const body = await c.request.text()11
12    const hmac = crypto.createHmac('sha256', secret);13    const digest = Buffer.from(hmac.update(body).digest('hex'), 'utf8');14    const signature = Buffer.from(headers.get('X-Signature') || '', 'utf8');15
16    if (!crypto.timingSafeEqual(digest, signature)) {17      throw new Response("Inavlid Signature", {18        status: 40019      })20    }21
22  }23
24  return json({})25}
校验正确后,我们就可以使用 Lemon 传来的数据, 在数据库中写入付费信息。有几个信息要特别留意:
attributes.user_email购买者的 email 地址attributes.first_order_item.product_id购买商品的 product id,attributes.first_order_item.variant_id购买商品的 variant id, 用于单个商品多个品类的判断
xxxxxxxxxx141const jsonBody = JSON.parse(body)2
3// 判断商品 product id4if (jsonBody.first_order_item.product_id !== process.env.LEMON_PRODUCT_ID) {5  throw new Response({}, {6    status: 4047  })8}9
10// 根据业务插入付费信息11await prisma.user.update({12  email: jsonBody.attributes.user_email,13  isPremium: true14})
部署应用到 Zeabur
应用在开发完成后,可以上线了。Remix 应用的部署比较简单,可以用的平台也很多。我个人推荐使用 Zeabur, 是国内团队做的一个部署平台,可以很方便地部署你的 Web app, 并且在项目中创建 postgresql 数据库、Redis 等很多项目需要的服务,收费也比较便宜,有全球多个部署节点选择。
对于 Remix 应用的部署,我个人建议使用 Docker 的方式,因为不同的部署平台对于 serverless function 的部署机制会有不同,用 Docker 能保持环境一致性,无论日后迁移到其它平台,都不会出问题。
所以,我们首先编写一个简单的 Dockerfile:
xxxxxxxxxx111FROM node:202
3COPY . /app4WORKDIR /app5
6RUN npm i -g pnpm7RUN pnpm i 8RUN pnpm run build9
10EXPOSE 300011ENTRYPOINT ["npm", "start"]
这个 Dockerfile 真的很简单。安装依赖、暴露 3000 端口,入口为 npm start 命令。
现在,把代码上传到 GitHub, 注册好 Zeabur 后,创建一个 Zeabur 的 project:
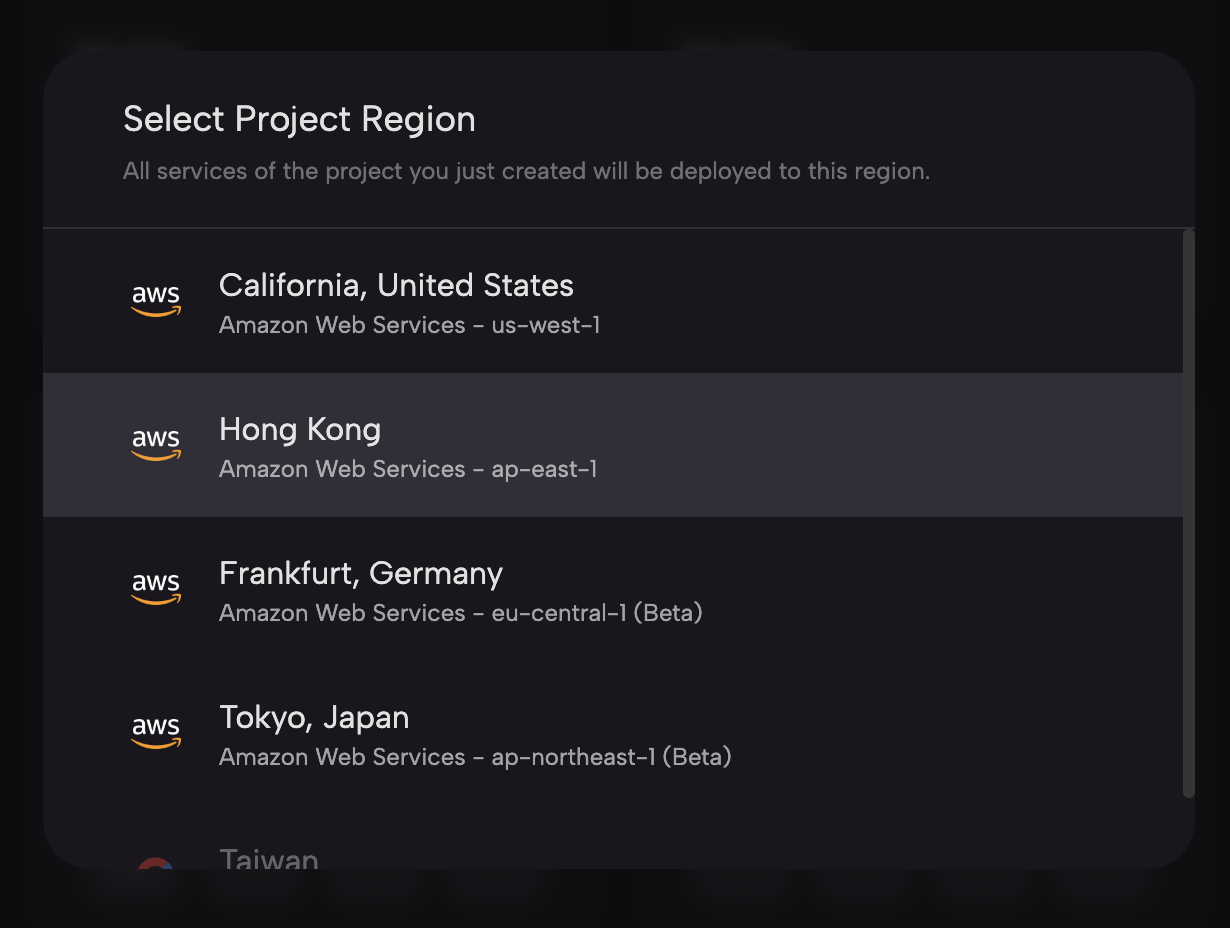
进入 Project 后,点击 new service, 创建一个 service. service type 选择 Git, 然后就可以选择你的 Github 仓库了。
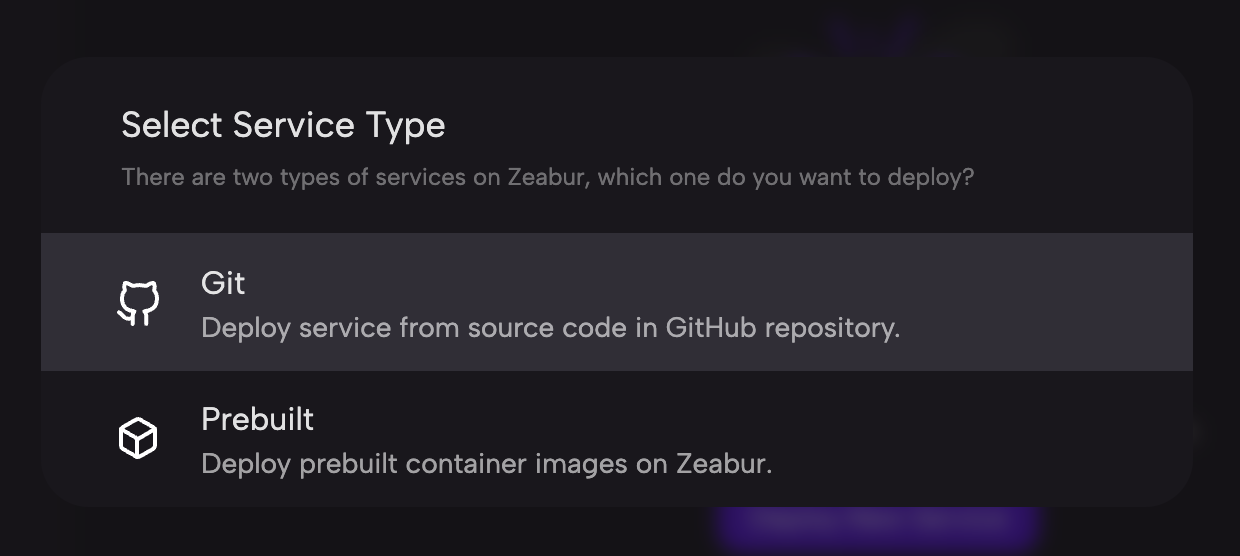
Zeabur 会按照你的 Dockerfile 进行构建和部署。现在,在 service 的页面中,添加 variable (环境变量),把应用需要用到的环境变量设置到应用中:
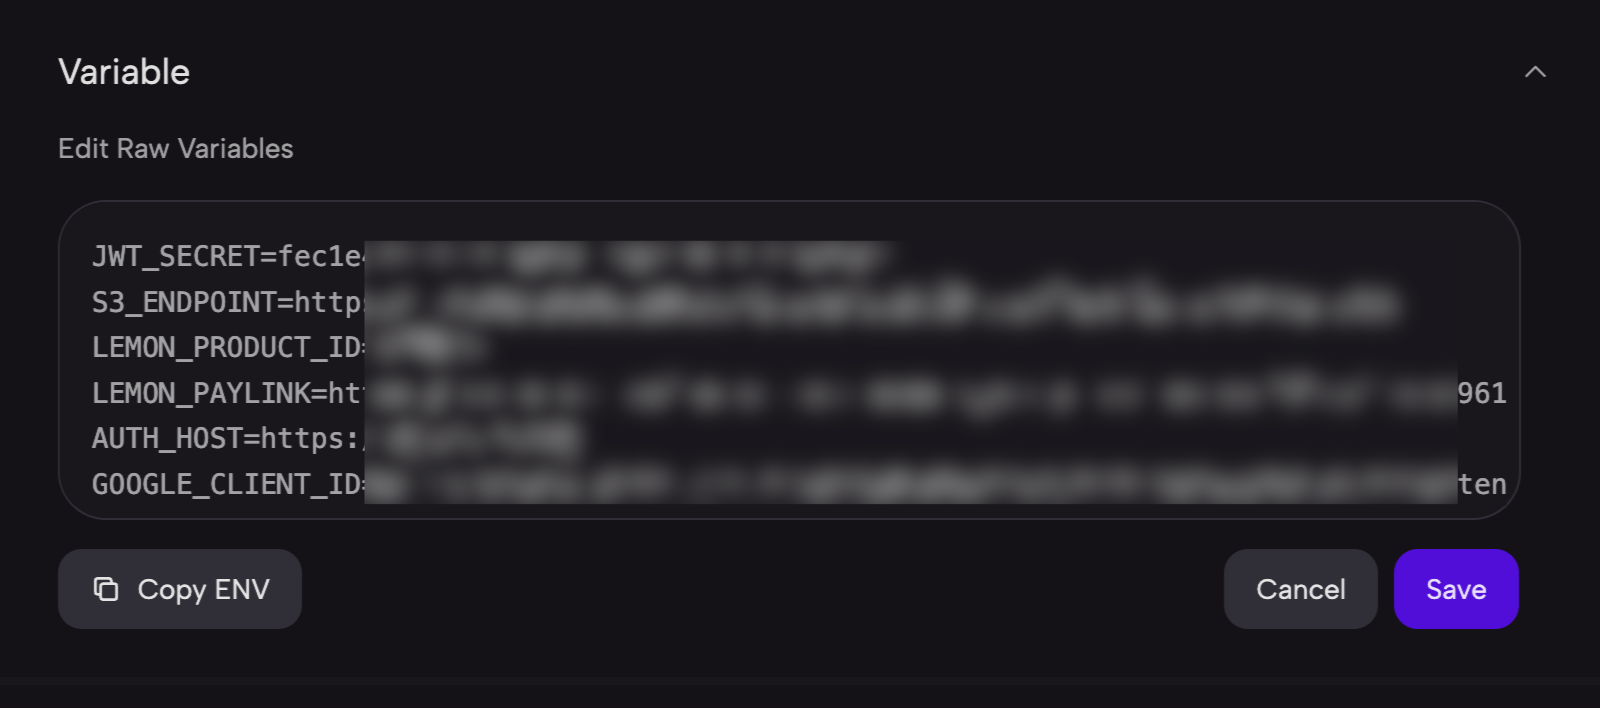
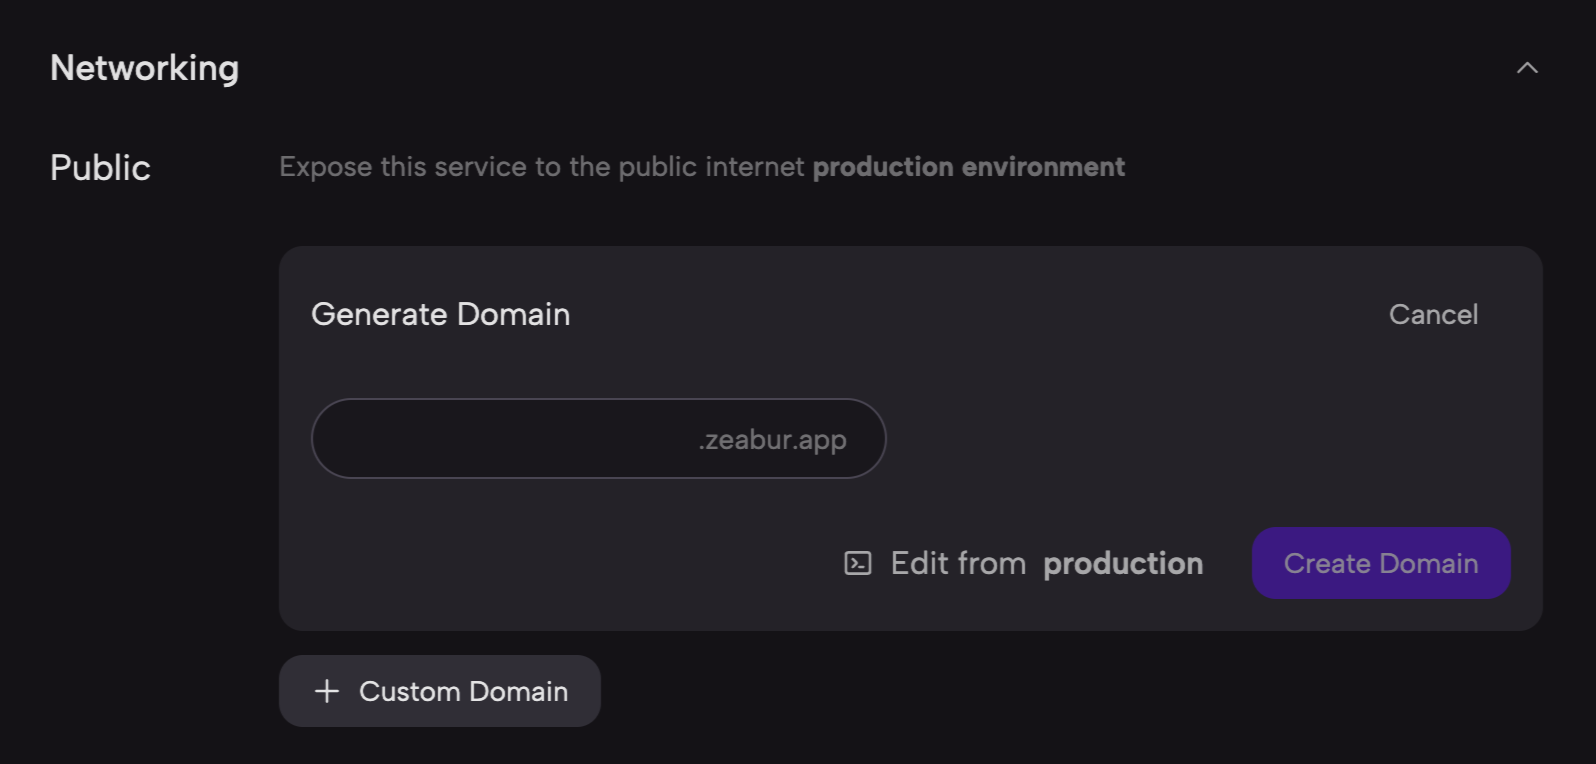
当应用部署成功后,你可以在 Networking 中,给你的应用一个 zeabur 二级域名(例如 myblog.zeabur.app),或者你自己的自定义域名:
